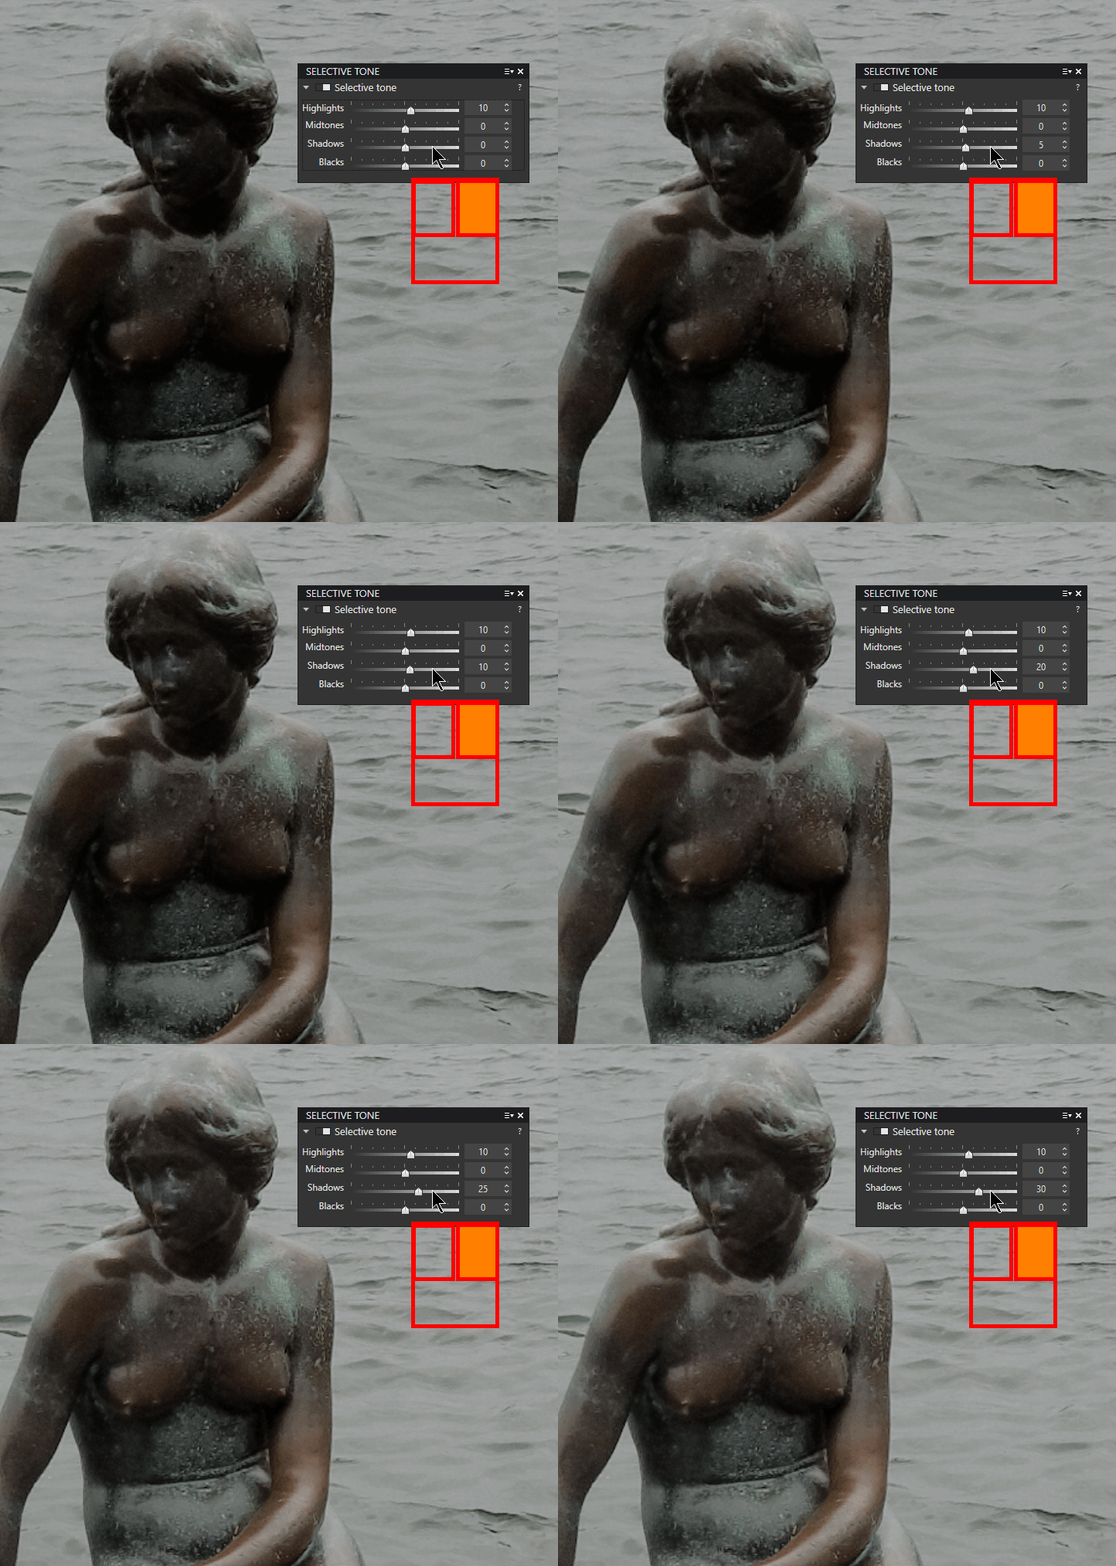
Sliding the sliders to achieve the most subtle correction is not always the most efficient and most practical way.
Increasing the values in steps of 5 allows you to get to the goal more quickly and to easily compare the corrections applied to several images of the same series.
For example, 10 on each image is more easily spotted than 8 and 12, often with identical appearing effects.

Click directly on the adjustment rail is the subtle and effective method:
– RIGHT Click on the rail, to the left or right of the pointer, for a smooth and controlled progression of the correction in steps of 5 (illustration)
– It is also possible to change values by the 4 arrows +/-1, by mouse wheel and by page up/down keys +/-5.
Make sure that the mouse cursor does not leave the button rail (it means the pointer is highlighted a bit), otherwise the focus is lost.
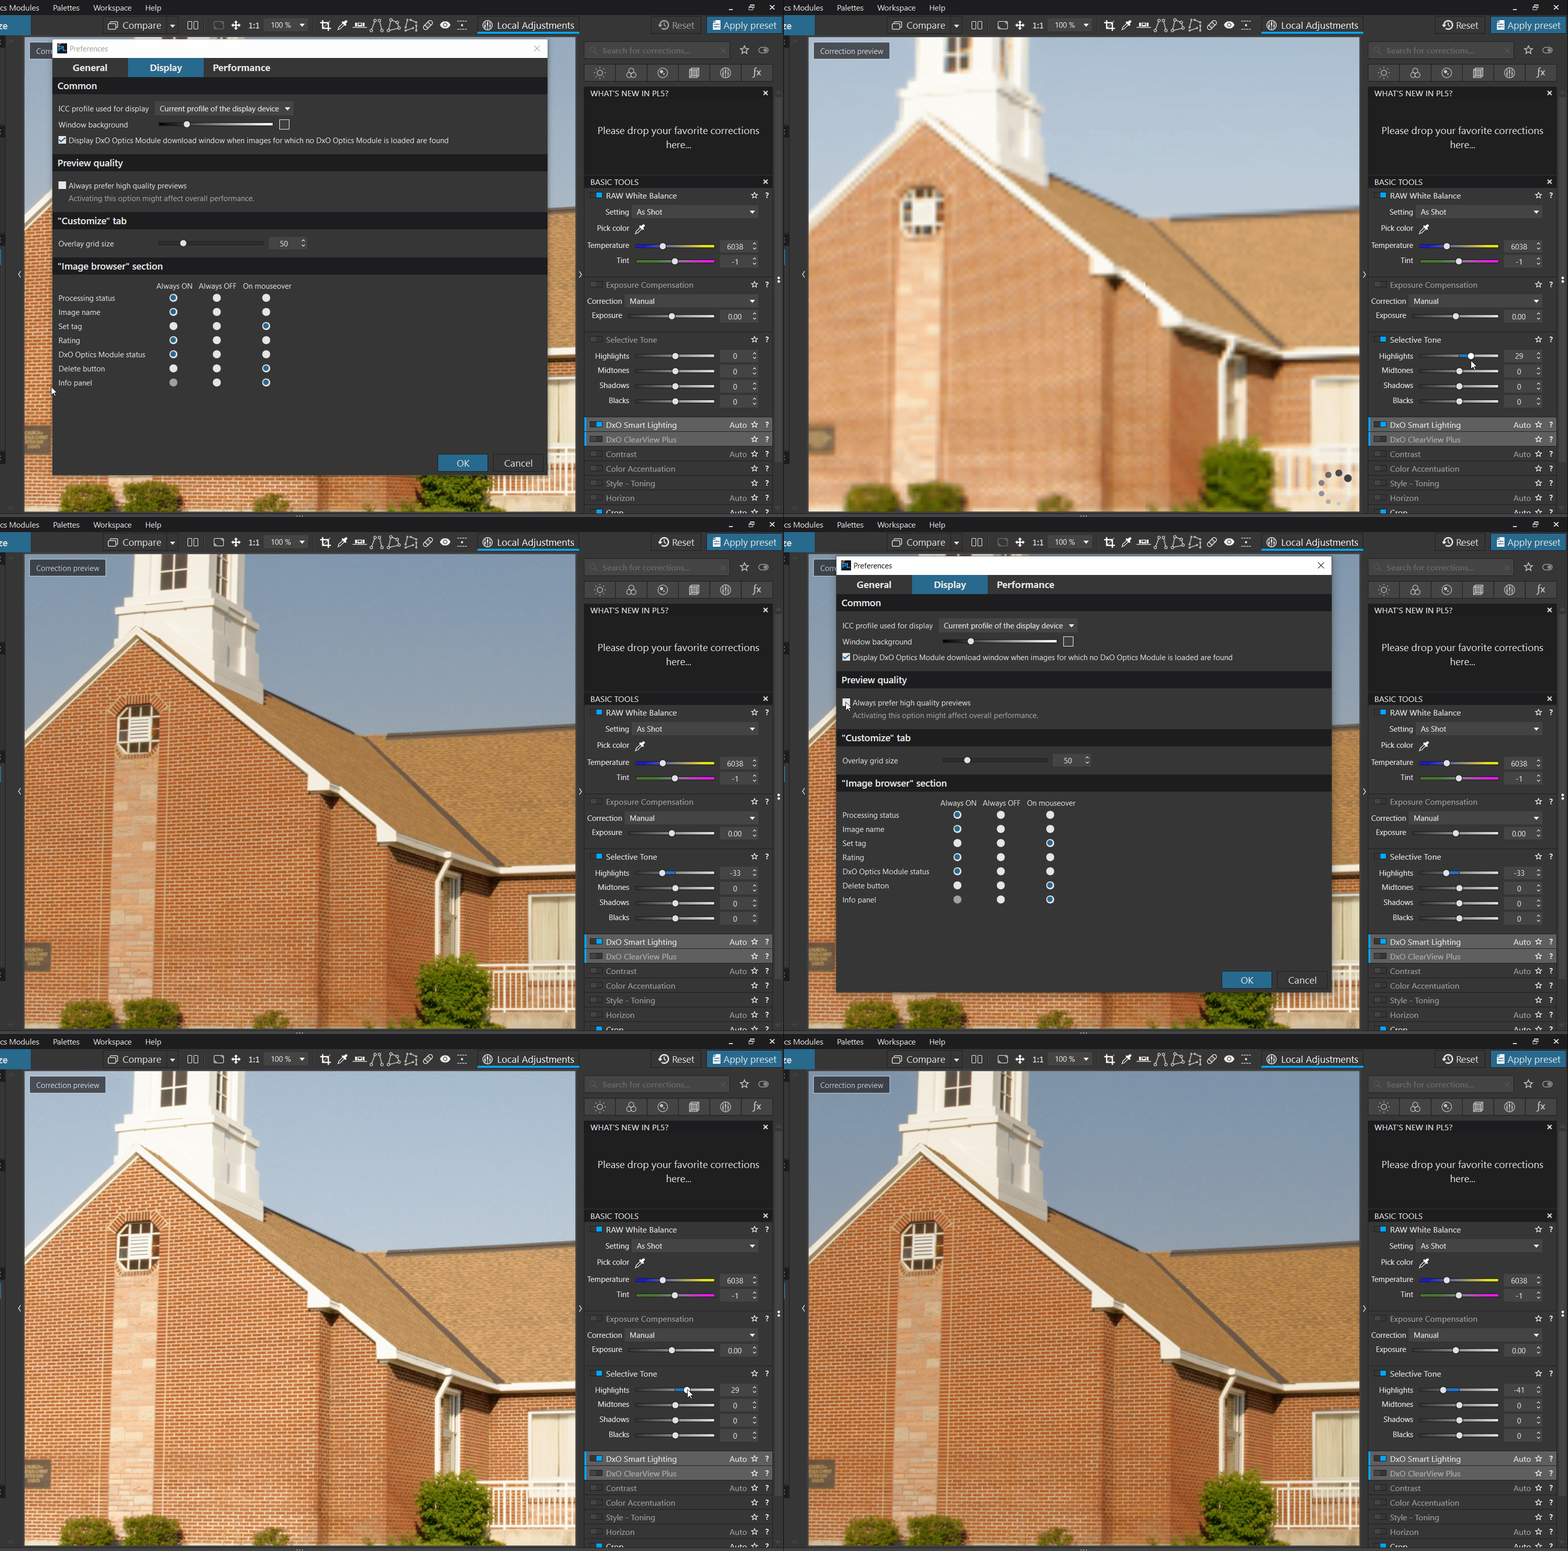
Applying the correction instantly by dragging the sliders can be binding with PhotoLab depending on the modest graphics performance of the computer. DxO optimized display speed by calculating a downsampled (pixelated) version of the image for functions related to light and color parameters. This gain in display fluidity results in a momentarily blurry display which can be disturbing.
Do not drag the sliderto avoid this phenomenon, rather click on the rail or the button and use the wheel.

Since release 5 of PhotoLab, DxO allows you to disable this function.
– Edit / Preferences / Display / YES Always prefer high quality previews
By default, it is not activated. Think about it !
The user of a powerful GPU can enjoy better resolution preview always by activating it.
The difference is most noticeable for the Light and Color sliders.
BEWARE. If this option is enabled on a machine that is not powerful enough, the preview update will not be smooth at all and the behavior of some sliders will be strongly affected.
– By double clicking on the pointer reset changes to the default value calculated by PL
– Quickly compare two corrections without leaving the screen with the Undo / Redo function (Ctrl+Z / Ctrl+Y)
Note that since version 4 of PhotoLab, the design of the palettes has been revised in order to standardize the presentations on both OS.
The scale markers have disappeared on the Windows version (screenshots were not taken on the most recent versions).
In the same way, a personal preset (0- Standard) can provide predefined starting values (different from the default value) on an inactive correction. Just click on the rail to start this correction from this custom value.
– In my personal Preset a correction is inactive and set by default to 15
– Right click on the right part of the rail so that it is positioned on the expected value of 20
See the
tutorial “Efficiency with PhotoLab – Presets“
The magic wand is another tool sometimes backed onto cursors.
Not all corrections have it.
* The magic wand applies the optimal value defined by PhotoLab according to the tool used and the circumstances of the shooting. It depends on the image.
– The word “Auto” appears to the right of the title
This value, given by the magic wand, is different from that given by the double click:
* The default value, generally halfway, corresponds to the average correction proposed by the software.
* The value 0 by default indicates that this correction is optional
– The microContrast (Light palette) can return to its optimal value, with the magic wand, OR be canceled, by a double click

The scale of values is not always obvious. Here is an example::
– Variation of the intensity of an effect: light to strong, from 0 to 200%, optimized to 100%
– Application (or regression) of an effect: absent to complete, from 0 to 100%, NOT applied by default (the value can be 0 or 100)
Similarly, the range of settings available to give character to the image can be interpreted as follows:
– Amplitude of the correction: decrease to increase, from -100 to +100, none to 100%
* A last method to use the benefit of a correction is to uncheck the blue box and then enable it again.
The range of change of the slider’s position can be very important in order to offer a part of edition to the images. Pushing them can cause artifacts to appear.
A non-absolute rule would be to consider that values less than 50% of the slider scope allow objective correction of the photo. That is, to keep the atmosphere of the shot.
PhotoLab also allows post-processing of the JPEG images from the cameras. It is often necessary to push harder.
TuToDxO.com – All rights reserved – tous droits réservés.


