Sommaire
The preview window tends to show the effect of the corrections as well as possible.
Keep in mind, you can only appreciate their effect by viewing the exported image.
* It has been resized (depending on the intended use) or full size.
* The sharpness is also dependent on the compression.
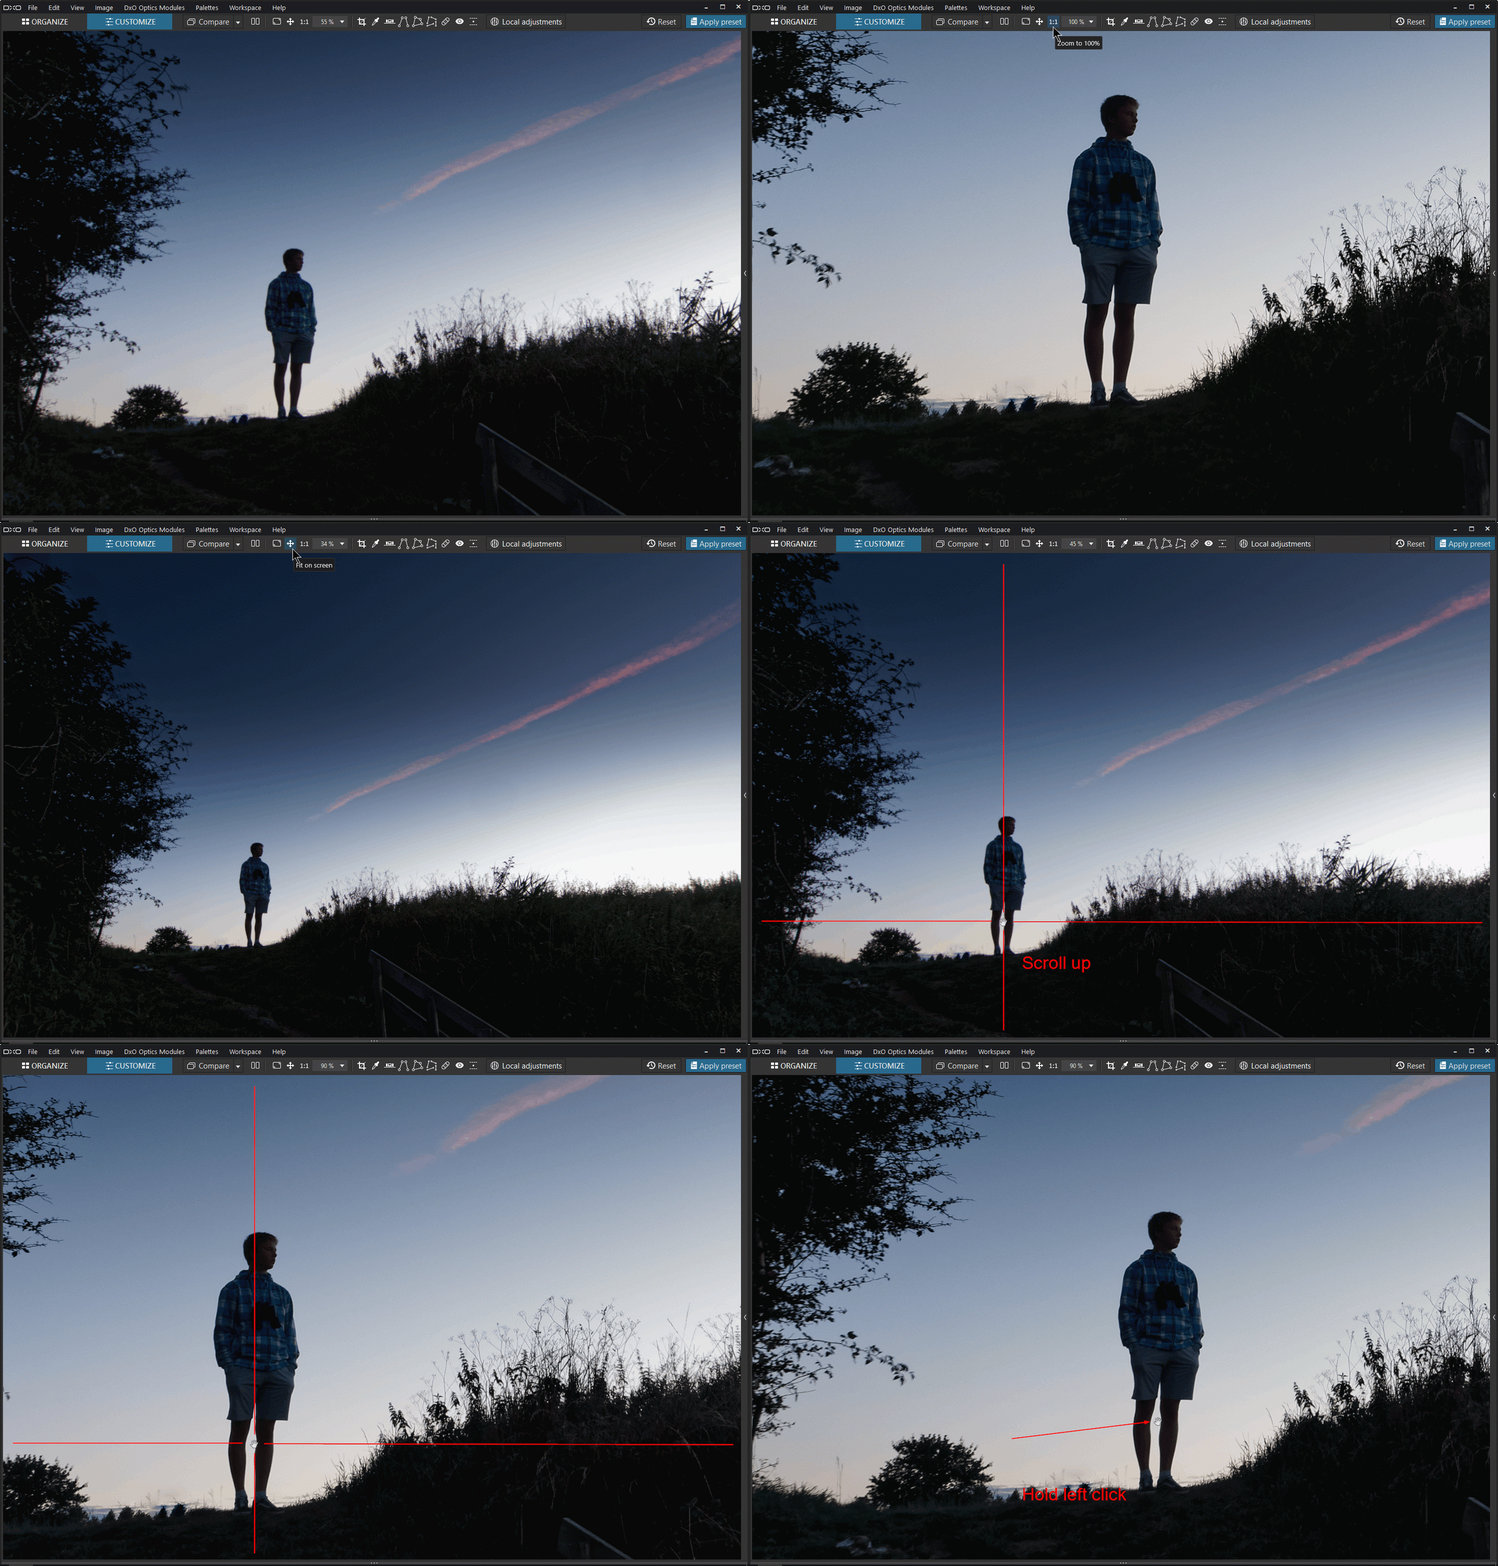
Zoom

– “FIT ON SCREEN” button (F3 / Cmd+ 0) adjusts display to the screen size
– “1:1” button (F4 / Cmd+ 1) OR double-click in the image for 100% display
– Click+ wheel: the location of the mouse slider defines the center of the pan zoom
– Hold left click to navigate the image when zooming in
Pan zoom
When the main viewer does not contain the entire image, the cursor with the appearance of a hand means that navigation in the image (panning) is possible.
– Hold left click to navigate the image
When using a tool function (pick color or Local Adjustment mask)
– Keep the spacebar pressed and move with the “hand tool” (Left-clicking and dragging)
Display overview
Full-screen mode is ideal for sorting at the beginning of a session and then viewing the work you’ve done (F11 /Shift+ Cmd+ F).
The “Corrections Preview” can be hidden by the toggle:
– Menu: View – Image information overlay (Ctrl+ H / I)
Always try to view your image at the closest ratio to 1:1 to best judge the corrections made. An Ultra High Definition (4K) screen makes a difference.
Some effects of image definition corrections are only visible in preview with a zoom at least of 75%.
The preview mode displays all corrections only from this zoom value.
To achieve a faster display at zoom factors below 75%, the HQ noise reduction (the permanent display mode), dead pixels and moiré corrections are not activated.
Also DxO estimated that below this value the improvements of the sharpness of the optics as well as the correction of chromatic aberrations are not compatible with the imprecision of an interpolated view.
According to DxO:
Sharpness is all about rendering detail. That’s why it may seem odd to reduce the preview to 50% or even less, as you get an interpolated view of the real effect (and therefore not accurate), which is, in a way, counterproductive.Pixels have a physical size: when you view an image at 100% on your screen (whatever its resolution), 1 pixel of your image occupies 1 pixel of your screen.
Let’s take a 4000 px wide photo displayed on a 2000 px screen.
When you zoom out, the number of pixels on your screen remains the same (2,000 px), but it now displays (at a rate of 75%) 3,000 px of your image. Interpolation then takes place, as 1 physical pixel of your screen represents 1.5 pixels of your image.
TuToDxO.com – All rights reserved – tous droits réservés.


