Previous versions of PhotoLab (from 1 to 6) gave access to Local Settings via an equalizer.
Since version 7, the palette presentation has been available.
When a Local Adjustment is activated, the equalizer provides access to editing functions.
Each setting is accessible via a single slider, and the values indicated are relative. Local correction is added to global correction (except color temperature).
– Launch function
– Right-click on the image to be edited
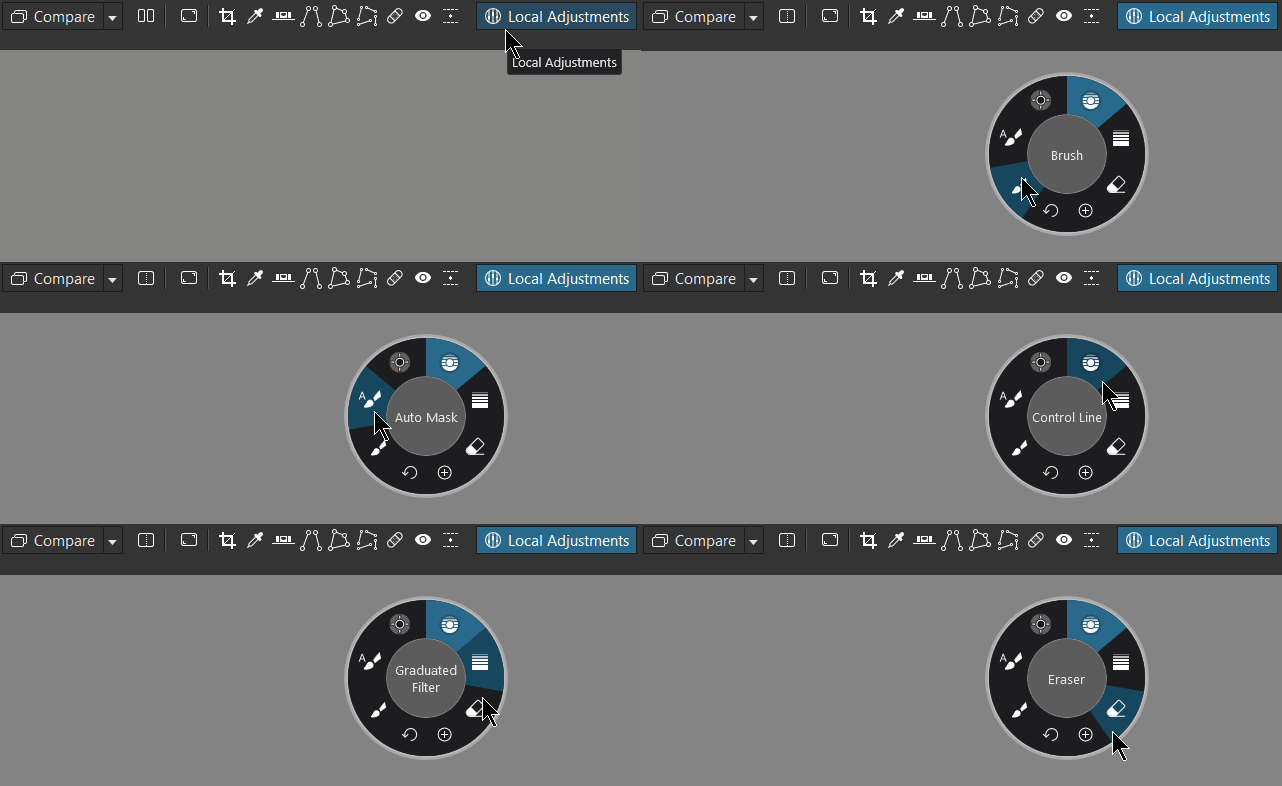
The settings
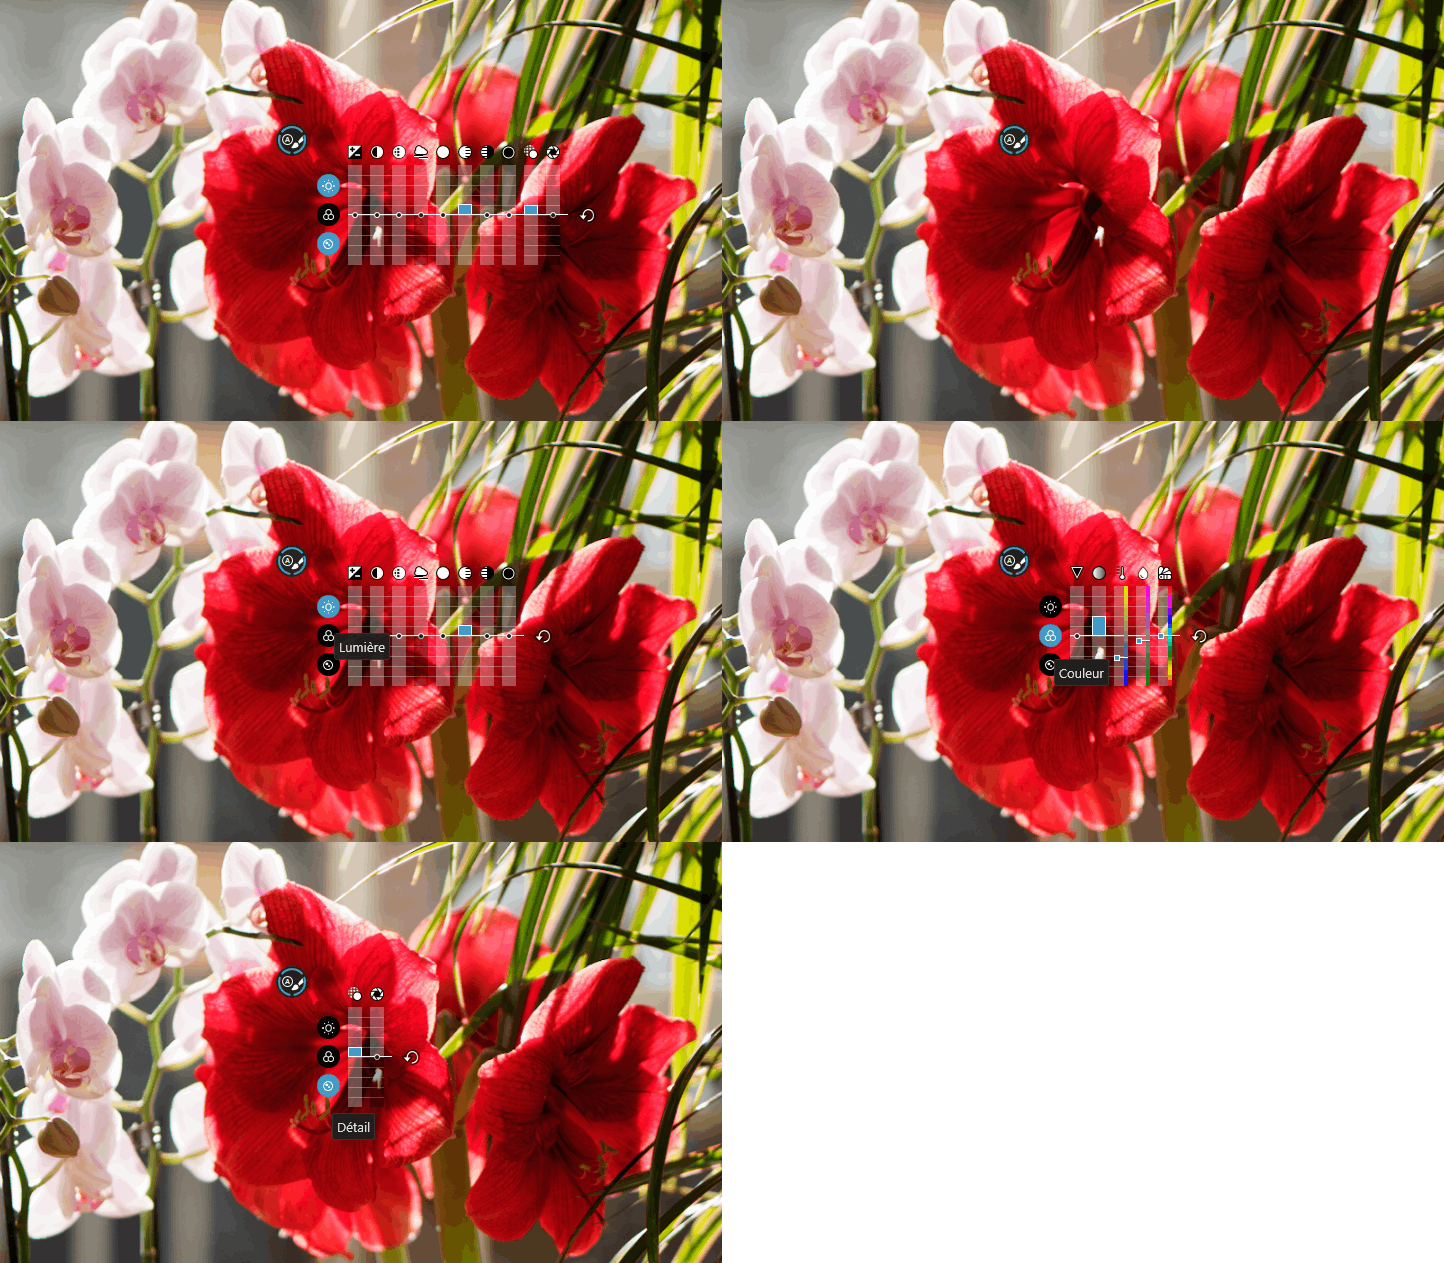
The equalizer settings are organized in 3 groups.
– Click to switch from one group to another: Light / Color / Detail
– Ctrl + Click to open the next group. All groups can be opened simultaneously
* Exposure: adjusts brightness within limit range ± 4 EV (cumulative global AND local corrections)
* Contrast and MicroContrast
* ClearView: removes the atmospheric veil and reduces the mist (Elite edition of PhotoLab only)
* Tone – Highlights, Midtones, Shadows and Blacks
* Vibrancy and Saturation
* Color temperature and Tint adjust (raw only): these adjustments are applied from the global correction but the indication is the absolute value (degrees Kelvin and drift)
* Hue: Color shift of a given angle on the color wheel (± 180 °)
* Sharpness: Enhances or reduces the sharpness enhancement in addition to the Global correction applied by the Lens sharpness or unsharp mask functions.It corresponds to the Intensity slider
Beware of over-accented which happens very quickly !
The result is visible on the screen only at a zoom value of at least 75%.
See the
tutorial “Mastery of PhotoLab – Sharpness Control“
* Blur: This exclusive feature to local adjustments applies a blur effect.
It is very interesting to simulate the shallow depth of field of large aperture lenses.
The quality of the blur is inferior to that of the Viewpoint’s vignette function.
The correction equalizer

– Drag the effect slider corresponding to the setting to touch up the area
– Progress is smoothed out by first dragging the mouse horizontally – Windows only
– Double-click in the gauge bar of a setting to reset it
– Click on the circular arrow at the end of the equalizer to reset the entire Local Control correction
* Equalizer can be hidden / shown with the E / I key
* Move the mouse cursor away from the main window to temporarily reduce all the tools and see the final effect

The equalizer is often (badly) placed on the area to be retouched. The first click determines its location and that of the local adjustment indicator.
Depending on the type of Local Control:
– Move the Control Line or Graduated Filter indicator along the line
The illustration shows how important the starting point of the brush is.
– Starting at the top left is a natural gesture
– Starting at the bottom right of the area to be retouched is an acquisition gesture
A radical solution is to place the marker on a neutral area.
– Give a light brush stroke outside the area
– Start a second one that becomes the main area
– By erasing the first zone, the marker will remain in its place
Local Adjustement Palette
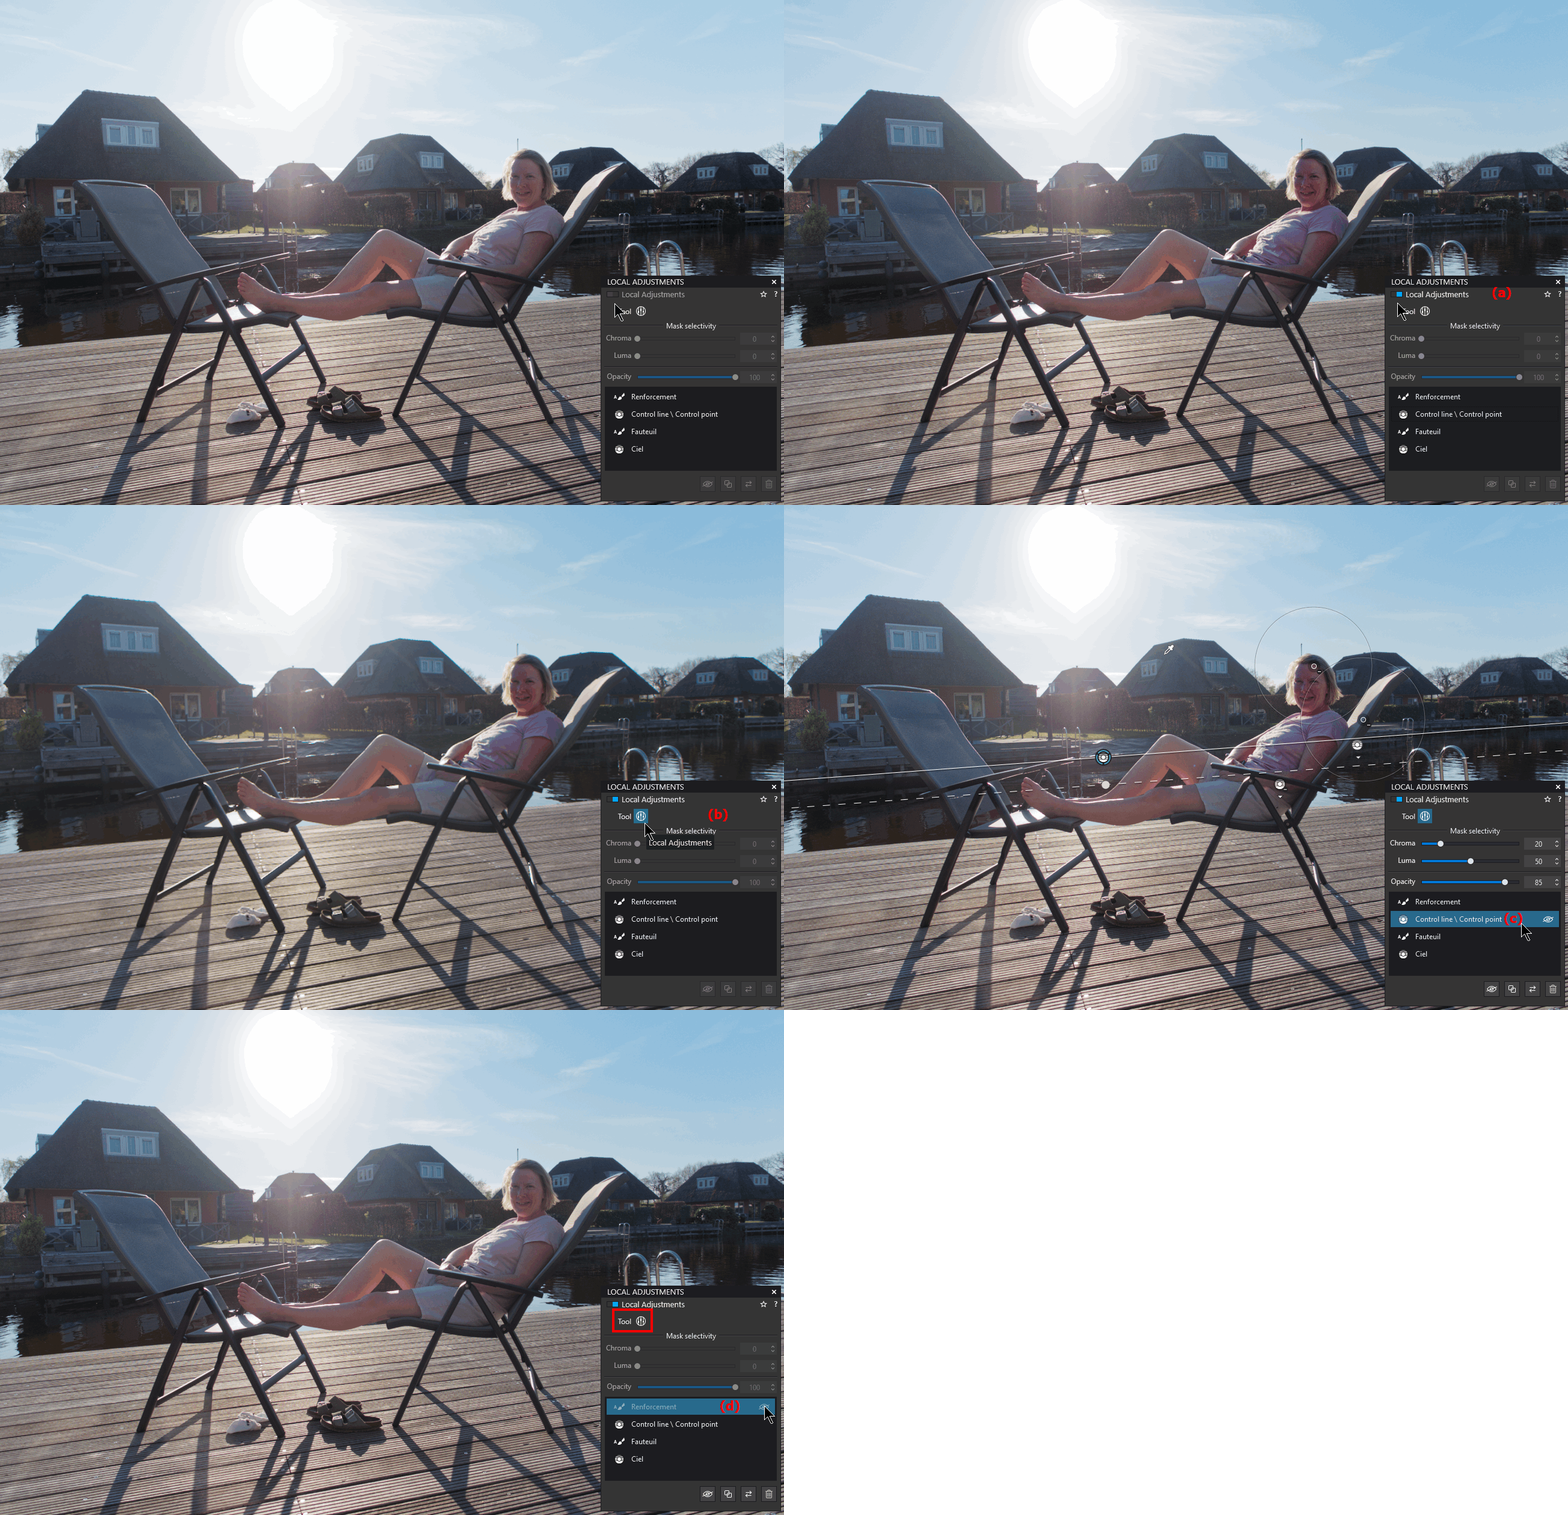
Local parameters are displayed in the order in which they were created. Renaming them has no influence.
A- View the effect of all Local Adjustments (like any other correction) (a)
B- Activate – Desactivate the Local Adjustments tool (b)
Easily locate each Local Control when the tool (step B) is activated.
– Position the mouse cursor to locate the Local Control (c)
– Click to activate the Local Control
– Modify the mask and/or the correction
– Change the opacity of each Local Adjustment independently
– Duplicate, Invert OR Delete the Local Adjustment
Control the correction of the Local Adjustments when tool (B) is disabled.
– Change the opacity of each Local Adjustment independently
– Show – Hide each Local Control (shift+ H) (d)
– Reverse the area of influence of the current Local Control (shift+ I)
– Delete the Local Control (DEL)
The Compare mode
When the Local Adjustments feature is enabled, pressing the COMPARE button (Ctrl+ D /D) toggles between displaying the image with Local Adjustments applied and the image as corrected with Global Adjustments only.
As a reminder, in the Global environment, the default comparison is from “no correction“.
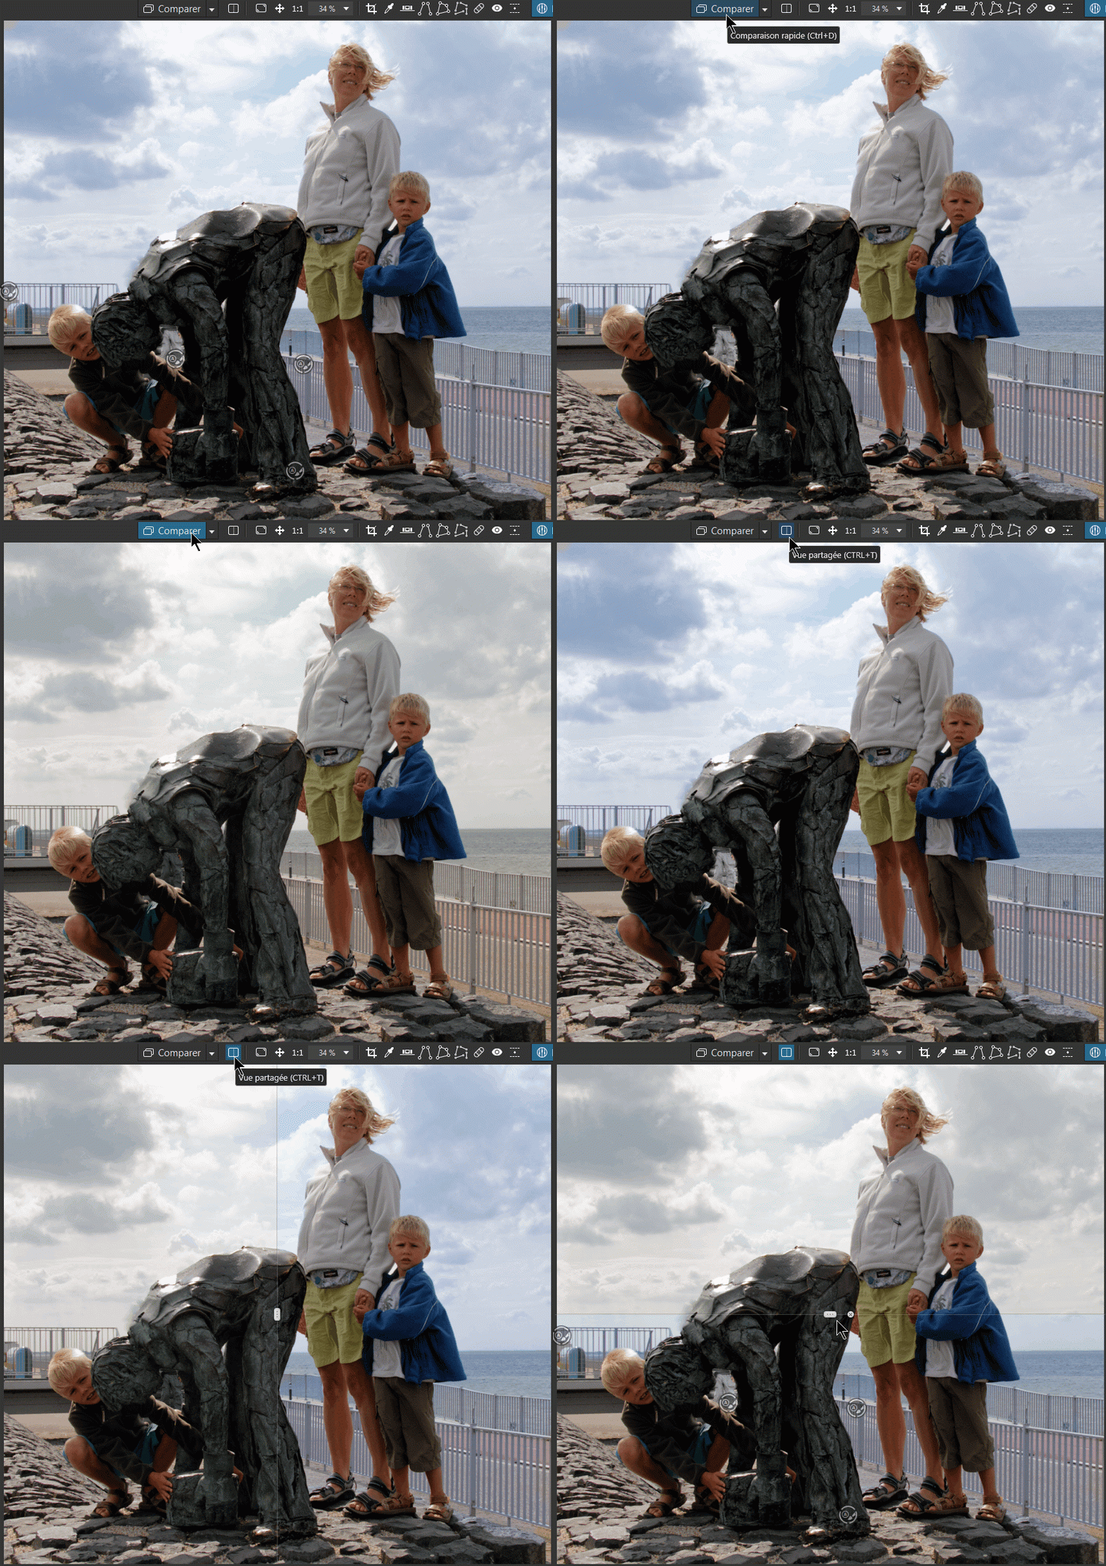
The main window (viewer) can also be split in two.
– Click the split icon in the upper toolbar to the right of the COMPARE button (Ctrl+ T / C)
– Double-click the slider for a horizontal split
TuToDxO.com – All rights reserved – tous droits réservés.
