Sommaire
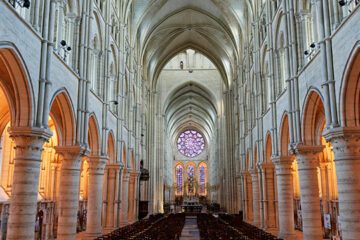
Success of the automatic perspective correction depends on several criteria:
* The presence of enough vertical and / or horizontal components
* Absence of disturbing elements (remarkable neither horizontal nor vertical lines)
When these conditions are met, ViewPoint gives very good results.
In palette “Perspective”
– ViewPoint: “Auto” button
– PhotoLab: Magic wand
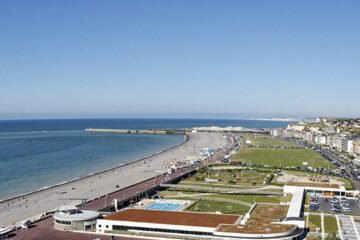
A successful automatic correction may truncate a large part of the subject.
This is a very common situation where ViewPoint crops to the narrowest part of the image (usually at the bottom since most buildings photos are low-angle shots).
Cropping is required and sometimes setting a different image ratio as well.
In palette “Crop”
– ViewPoint: Choose “Custom” from the drop-down list, then enter the width / height ratio
– PhotoLab: Choose or enter the width / height value directly in the “Aspect ratio”
Viewpoint only: The checkbox “Constrain to image” forces the frame to remain in the image area.
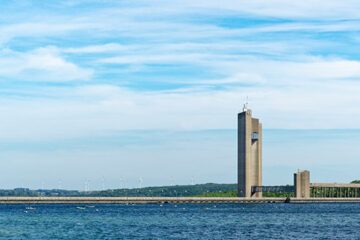
Limit the auto correction to one of the directions; vertical or horizontal
This limitation in the directions makes it possible to preserve the automatism of the perspective correction.
In palette “Perspective”
– ViewPoint: “Auto Correct” drop-down list
– PhotoLab: “Auto mode” – Choose the desired direction:
– Verticals & Horizontals (default)
– Verticals only
– Horizontals only
In this illustration, verticals correction only is the one that comes closest to an exact correction
Modulate the intensity of the correction
By default, the automatic correction is complete (100%), that is to say the directions are perfect. It is possible to reduce its effect with the slider “Intensity“.
In palette “Perspective”
– Acting on the “Intensity” slider

TuToDxO.com – All rights reserved – tous droits réservés.