Creating Virtual Copies consists of duplicating the current settings of a photo in process and then trying out variants of the corrections.
They are useful for stacking complex corrections (e.g During Repair to easily return to the previous state).
– Right Click – Create a Virtual Copy (Ctrl+ J/ Cmd+ D)
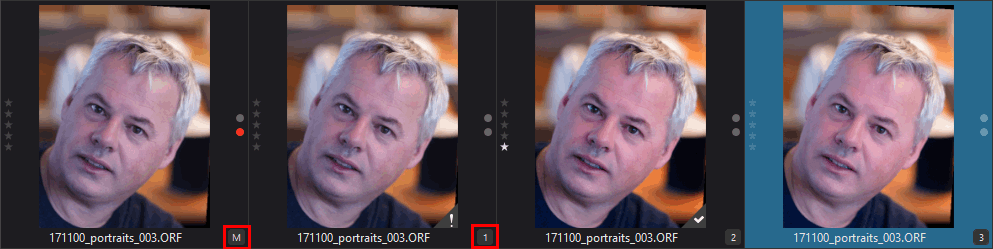
* The original image becomes the “Master” image and is identified by an “M” icon in the Image Explorer.
Virtual copies are identified by a number (1), (2), … after the file name
* A created virtual copy becomes active and is always the last place and becomes active
* Deleting the main image causes all virtual copies to be deleted
Only the MacOS version lets you rename each virtual version.
Even better, DxO should introduce a secondary name to the virtual copy.
For various reasons such as opening the photo with an older version of PhotoLab or when using multiple computers on the same shared disk space (NAS), DxO has adopted a security strategy; the “new” edits are added in a virtual copy.
Virtual copies are not as nice to use as FilmPack snapshots in its stand-alone version. The functionality is basic and efficient.
A member of the Tutodxo.com team, Mark Silverstein, has made a collection of presets that allow for the preview of the effects.
CAUTION – There are two versions of FilmPack.
<<< Download FilmPack 5 previews here >>>
<<< Download FilmPack 6 previews here >>>
TuToDxO.com – All rights reserved – tous droits réservés.