The brush is used to create a mask totally independent of the image (no relation of content).
It is the universal tool, simple and basic.
– Right click in the image opens the Radial menu – Select the Brush (Shift+ B Brush)
– Paint the area and make a first change with the equalizer
An overflow can be erased or cancelled.
– Press the key Win: Alt / Mac: OPTION and “clean up”
– Going backwards with Ctrl+ Z / Cmd+ Z or restore with Ctrl+ Y / Cmd+ Y
The mask can be hidden – redisplayed by pressing the key M / Shift+ M
Brush settings:
* Size (Ctrl+ / Cmd+ wheel) is the diameter of the brush
* Feathering is edge diffusion of the brush (Shift+ wheel)
A value of 50% allows maintaining precision without marking the border.
* Opacity is the correction efficiency applied to the mask
A requested exposure correction +4 EV will be limited to +2.4 EV with an opacity value of 60%.
The illustration shows four masks.
Note the addition of the corrections when overlapping the 60% opacity masks.
In practice, the blur editing is too aggressive. It should be applied on a very subtle mask of opacity 10% max to control the effect smoothly.
The interest of the opacity parameter is to distinguish the power of the different masks in the Local Settings.
On the other hand, the opacity slider in the Local Adjustments palette allows you to adjust the power of the entire Local Adjustment.
* Flow is the paint load of the brush at each pass
Flow value determines the paint load in proportion to the requested opacity.Set a lower value for flow than that of the opacity
– Pass one or more times on the area
Make sure NOT to release the mouse button when creating the mask in ONE time!
The progression is not linear (13% + 13%> 26%).
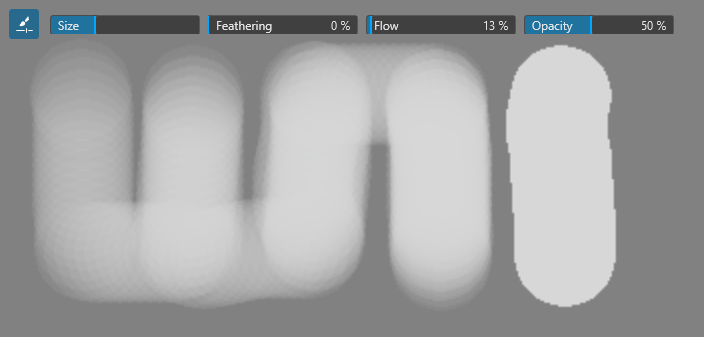
The illustration shows five vertical bars painted in 1 pass, then 2, etc…
The fourth bar reaches the maximum value asked to 50%.
The fifth is a painted indicator with a 100% flow.

TuToDxO.com – All rights reserved – tous droits réservés.