PhotoLab relies on the file system of OS (Windows or Mac OS).
The “PhotoLibrary” tab presents the Source Browser with access to OS favorites.
Unlike others software, there is no need to import photos. However, PL does store its parameters in a database.
This feature leads to the absence of the “save” menu, each correction being saved in real time. In use, it turns out to be rather powerful.
See the
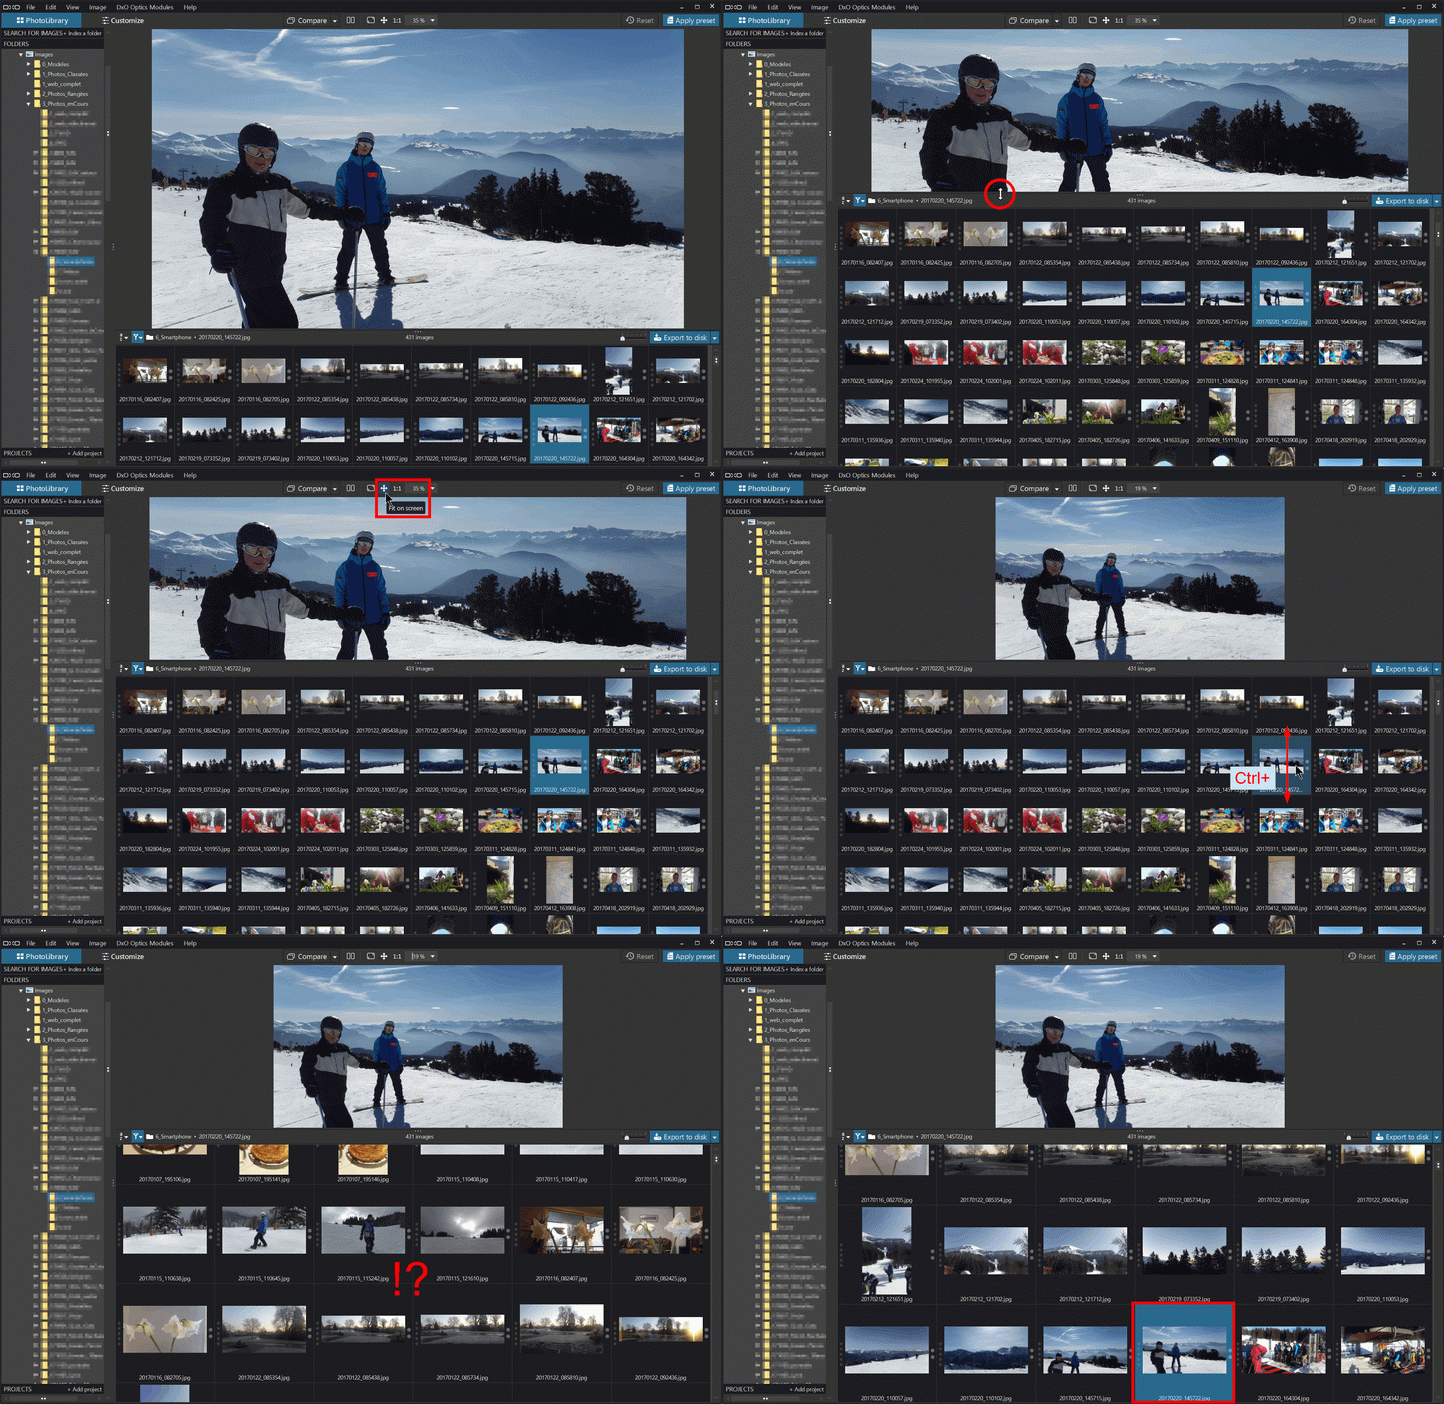
In the “PhotoLibrary” tab of PhotoLab, the Image browser (also called filmstrip) allows you to sort the images.

– Adjust the height of the grid to specify the ratio of the window thumbnail / preview (illustration)
– Use the mouse wheel to scroll through the lines of the thumbnails
– Click on the “FIT TO SCREEN” button (F3 / Cmd + 0) to adjust the main preview display to the screen size
– Ctrl + wheel to enlarge / reduce the size of the thumbnails (the mouse cursor should just be on the thumbnails)
The active thumbnail is sometimes lost after a large size change:
– Click in the preview window, then on the left arrow key, and then on the right arrow key to restore it
The image explorer sometimes encounters a bug. PhotoLab considers that a folder it used to manage is now without images.
– Right click on the folder then “Refresh”
If not
– Quit PhotoLab
– Move the images with their side-cars to a new folder
– Restart PhotoLab so that it rediscovers the images in this unknown folder
– Move the images to the original folder
See the
tutorial “Photos Management – Image Browser filtering“
The properties window advantageously replaces the information pop-up window of the Image Browser (Filmstrip). During navigation its display is permanent.
– Menu (Windows only): Image – Image Properties (Ctrl+ I)
– Right or Left arrow to navigate
The display of some thumbnail icons can be simplified.
– Delete button – Use SHIFT+ SUP / Cmd+ backspace
– Information panel – Displayed on hover only
According to the options:
Preferences / Display / section “Image Explorer”
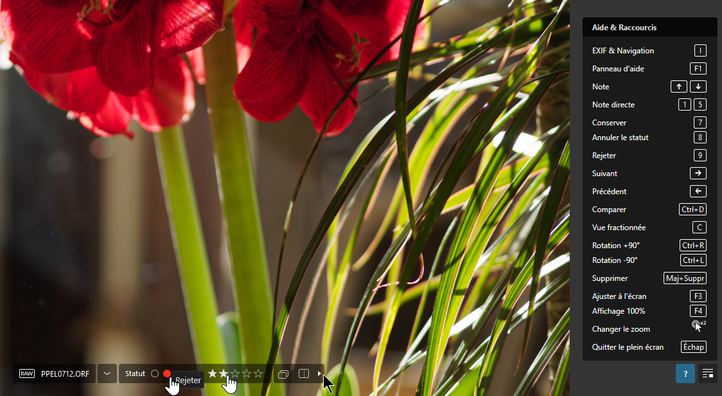
Full screen mode (shortcut F11 / Shift+ Cmd+ F) allows to discover the images and making the selection more comfortably.

Depending on the power of the computer this method can be terribly slow!
* It may be wise to split the report into several subfolders of about fifty images that after sorting will be combined into one
* It is also possible to cancel the corrections by applying the preset “4- No correction”
Do not forget to do the reverse manipulation “1- DxO Standard”.
See the
tutorial “Efficiency with PhotoLab – Presets“
– Click the icon of a marker, a note or the arrow for the next picture OR
– Type a number from 0 to 9 (Optional Ctrl key in this mode) or Right arrow for the next picture
TuToDxO.com – All rights reserved – tous droits réservés.


