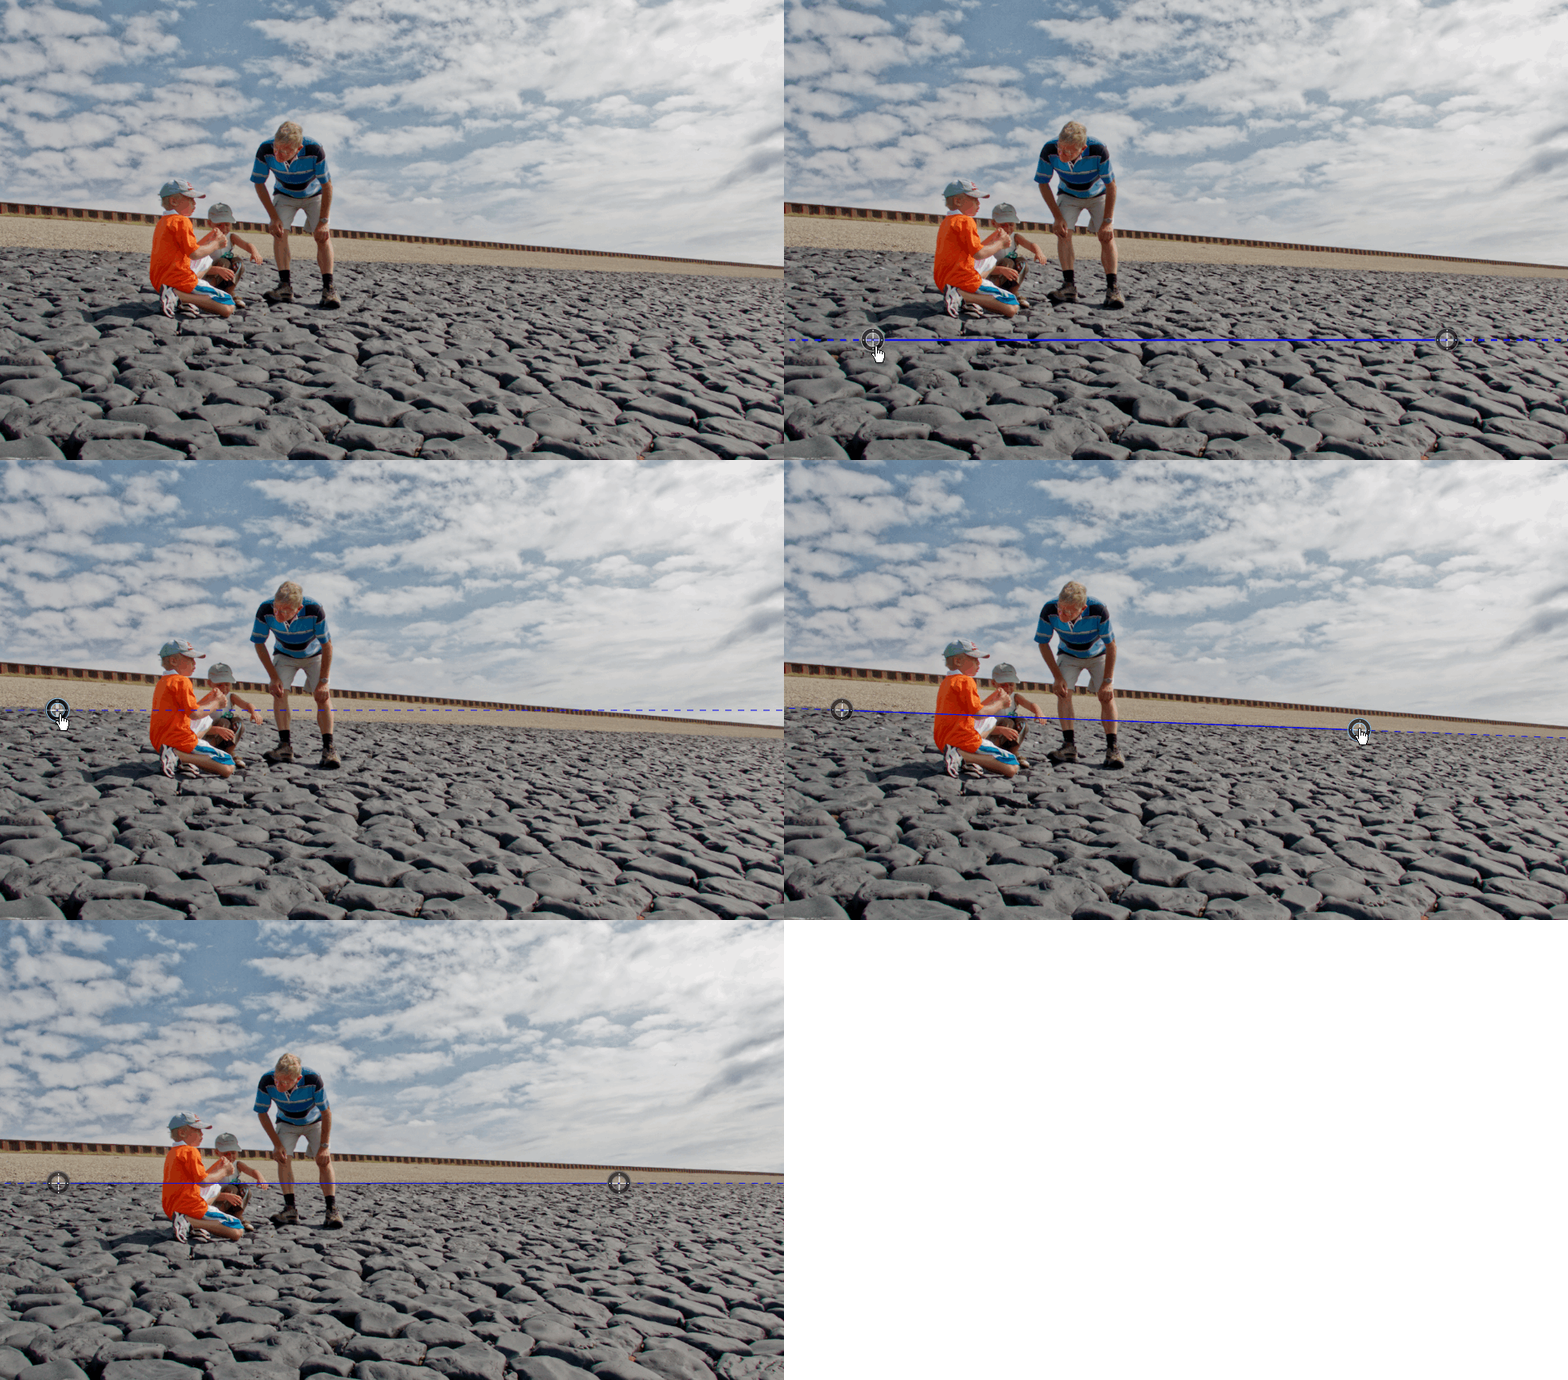
PhotoLab has automated the horizontal straightening of the image.
In our environment, horizontal lines are mostly vanishing lines, it is the respect of vertical lines that is most important. The Horizon function in PhotoLab puts more emphasis on vertical lines.
The automatic straightening is performed with the magic wand. The result is usually relevant.
Manual Straightening
When using manually, ignore the two tool handles offered when opening.
For a efficient procedure:
– Place the first point and hold the Left click
– Slide to the second point then release
– “PREVIEW” button to apply the correction
– ENTER key to apply and exit

A request for verticality correction will be understood as such by PhotoLab.
– Draw a line representing the expected vertical
Be careful not to destroy the perspective effect with too rigorous an adjustment. Preferably consider vertical lines which are always vertical in our visual environment.
It is sometimes appropriate to temporarily turn off Auto Crop (palette Geometry) in order to be aware of deleted content.
– Correction: Manual instead of Auto based on keystoning / horizon
The image can be rotated while cropping.
See the tutorial “Efficiency with PhotoLab – Cropping“
Note the general image orientation functions to be implemented before the correction.
– Contextual menu – Right click on the image / Transform
– Rotate to 90 ° on Left or Right (Ctrl + L or R / Cmd + L or R)
– Flip Horizontally or Vertically (with the ViewPoint plugin)
Straightening accuracy
The adjustment can be done with great precision.
– Menu: View – Grid (Ctrl+ G / G)
– Click on the slider of the palette then turn the mouse wheel. The step is 1° for each action
– Refine in steps of 0.01° with the up / down arrows to the right of the slider
Check for horizontality and especially verticality.
– Zoom in / out to check the verticality by making the lines of the image and the grid coincide
Corner recovery
The correction of the horizon transforms the original rectangular image into a diamond shape producing black triangles in the bounded box following the diagonal of the initial photo. Automatic cropping can make a significant part of the composition disappear.
A first workaround is to counteract image rotation with perspective straightening.
– Activate Crop with the option “Auto based on keystoning / horizon”
– Twist the image with the four-line perspective tool until all the black triangles have
This alternative is suitable for images without geometric reference points (constructions, …) as long as the deformation remains acceptable.
When making larger geometric corrections to the horizon or perspective, some essential elements of the composition on the edges of the image should be retained. The Repair function’s clone tool is unable to paint in areas outside of the raw photo frame.
The solution is to leave the black triangles in the frame and then export the image as is. They are now part of this version with larger dimensions than the original. Fill in the missing pixels using the “Clone” tool of the Repair function.
– Disable Auto Crop> manual correction
– Crop possibly leaving black areas
– Export the image in TIFF or DNG (*) without resizing it
– Open this image
– Complete the dark areas with the “Clone” tool
(*) Export the image in TIFF format if the image processing is finished. This version will be frozen and will only be used for cloning.
Export the image in DNG format to keep all the development latitude after completing the black pixels completion. This solution is more interesting because it allows all the latitude of correction.
See the tutorial “Mastery of PhotoLab – Exporting to DNG”
TuToDxO.com – All rights reserved – tous droits réservés.


