PhotoLab ReTouch, Repair tool (Eraser or Pad on other software) automatically offers a replacement area.
Two different algorithms are applied dependent on the use:
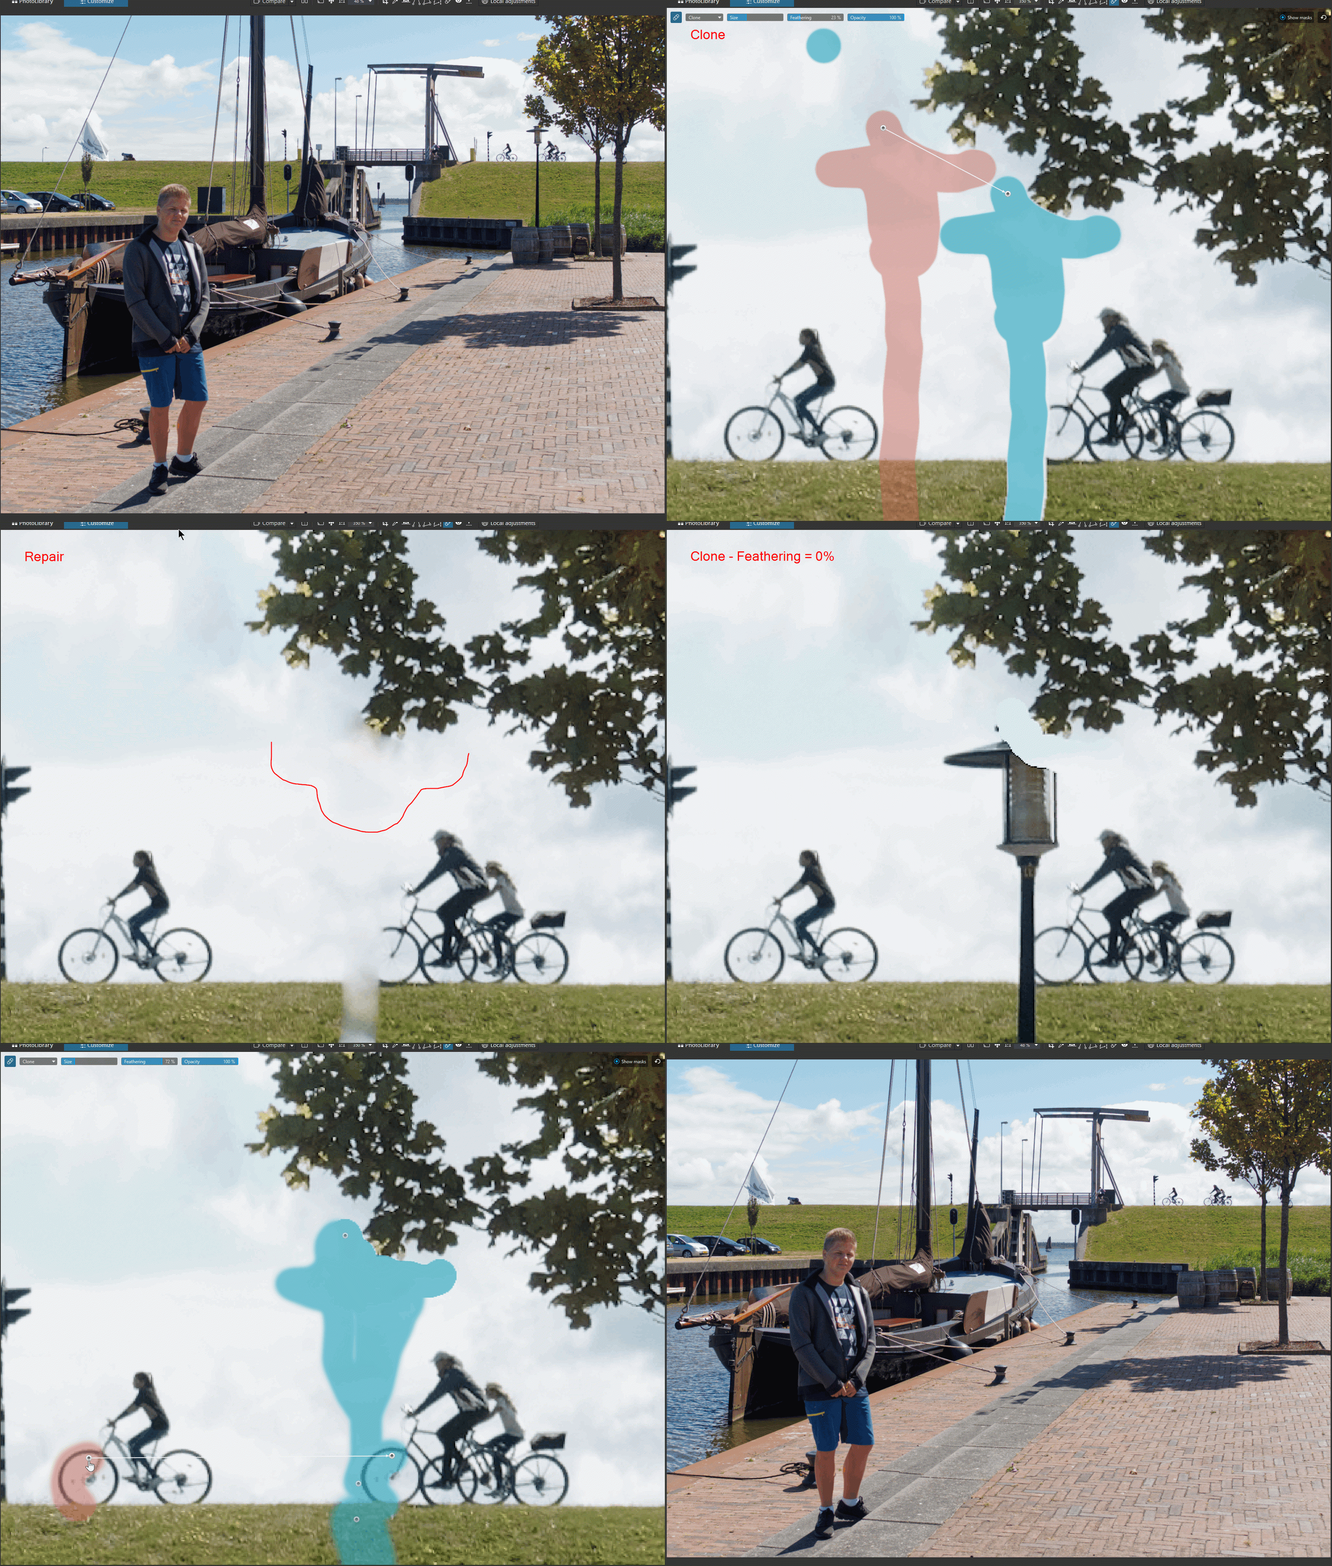
* Clone – Replacing one zone with another
* Repair – Initially dedicated to dust removal
The texture of the target area is replaced but its hue and luminance are respected.
An “object” (or dust) is replaced by the “drawing” of the source area but the hue and luminance of the target area are preserved.
Mask creation
The illustration was made with PhotoLab release 3.

– Draw the mask of the target area to be replaced
– To vary the diameter of the circle, Alt+ Right Clic /Ctrl+ option+ Left Clic and horizontal shift (*)
– To adjust the feathering (transition), Alt+ Right Clic /Ctrl+ option+ Left Clic and vertical shift (*), the diffusion is done towards the outside of the mask drawing
– Opacity control allows for smoother blending between the stamp and the background
– The tool automatically proposes a source area of the same shape
– Activate the masks visualization, “Show masks” button
– Move the source area by selecting its gizmo
– “Show masks” button to make them appear / disappear OR
– Move the mouse cursor out of the image for a preview of the result
(*) This unprecedented action is disconcerting. Moreover, the procedure of the previous versions (Ctrl+wheel) is no longer accessible.
* Display the image at 100% zoom to judge the rendering of the fusion
* It is better to proceed by small applications
* The size of the mask is insensitive to the zoom level, which is convenient for quick access to areas of different sizes
When the area to be erased is at the edge of the frame, the feathering must be set to 0% to avoid a ghost area.
If the edge of the mask inside side of the image is to be diffused:
– Draw a first mask in the form of a thin border along the edge of the image
– Then draw the expected mask over it with the correct progressive contour value
To clone an area accurately, reverse the order in which areas are created.
– First draw the source area
– Move this mask to the target area
– Move the area proposed by PhotoLab to the source area
Mask modification
A mask can be modified at any time (from one PhotoLab session to another).
– “Show masks” button if they were hidden during the last use
– The masks are only displayed when hovering over the gizmo
– Select a mask by its dot (the capture area is very narrow)
– Switch between “Clone” and “Repair” modes
– Change the feathering according to the mask border
Modify the mask by switching between the modification modes.
Select the Transform tool of the source shape. The area collected by the source shape is modified to be stretched or condensed into the target shape.
– Resize or rotate the source shape with the bounding box around the mask
– By pressing Shift / Shift : the ratio is kept when scaling. The opposite handle position is using as a pivot
– By pressing Alt / option : directional resizing takes the center of the area as a pivot
– By pressing Shift+ Alt / Shift+ option : ratio is kept and scaling is done from the center
– Flip, mirror horizontally or vertically the source shape and reset to its initial state with the buttons
Complete or reduce the target shape if necessary with the buttons.
– Add a line with a brush
– Erase the shape
A mask can be discontinuous. The interest is to be able to manage a group of the same shapes in a single correction.
Temporarily access the tool using the shortcuts.
– Add a line by pressing Shift /Shift
– Erase the shape by pressing Alt /option
– Transform the source area by pressing Ctrl / Cmd
The transformation shortcuts can be added together
– Ctrl+ Alt / Cmd+ option to resize according to the center
– Destroy the selected mask by typing “SUP”
– Press ENTER to exit the tool
The entire correction environment is hidden when the cursor is off the screen.

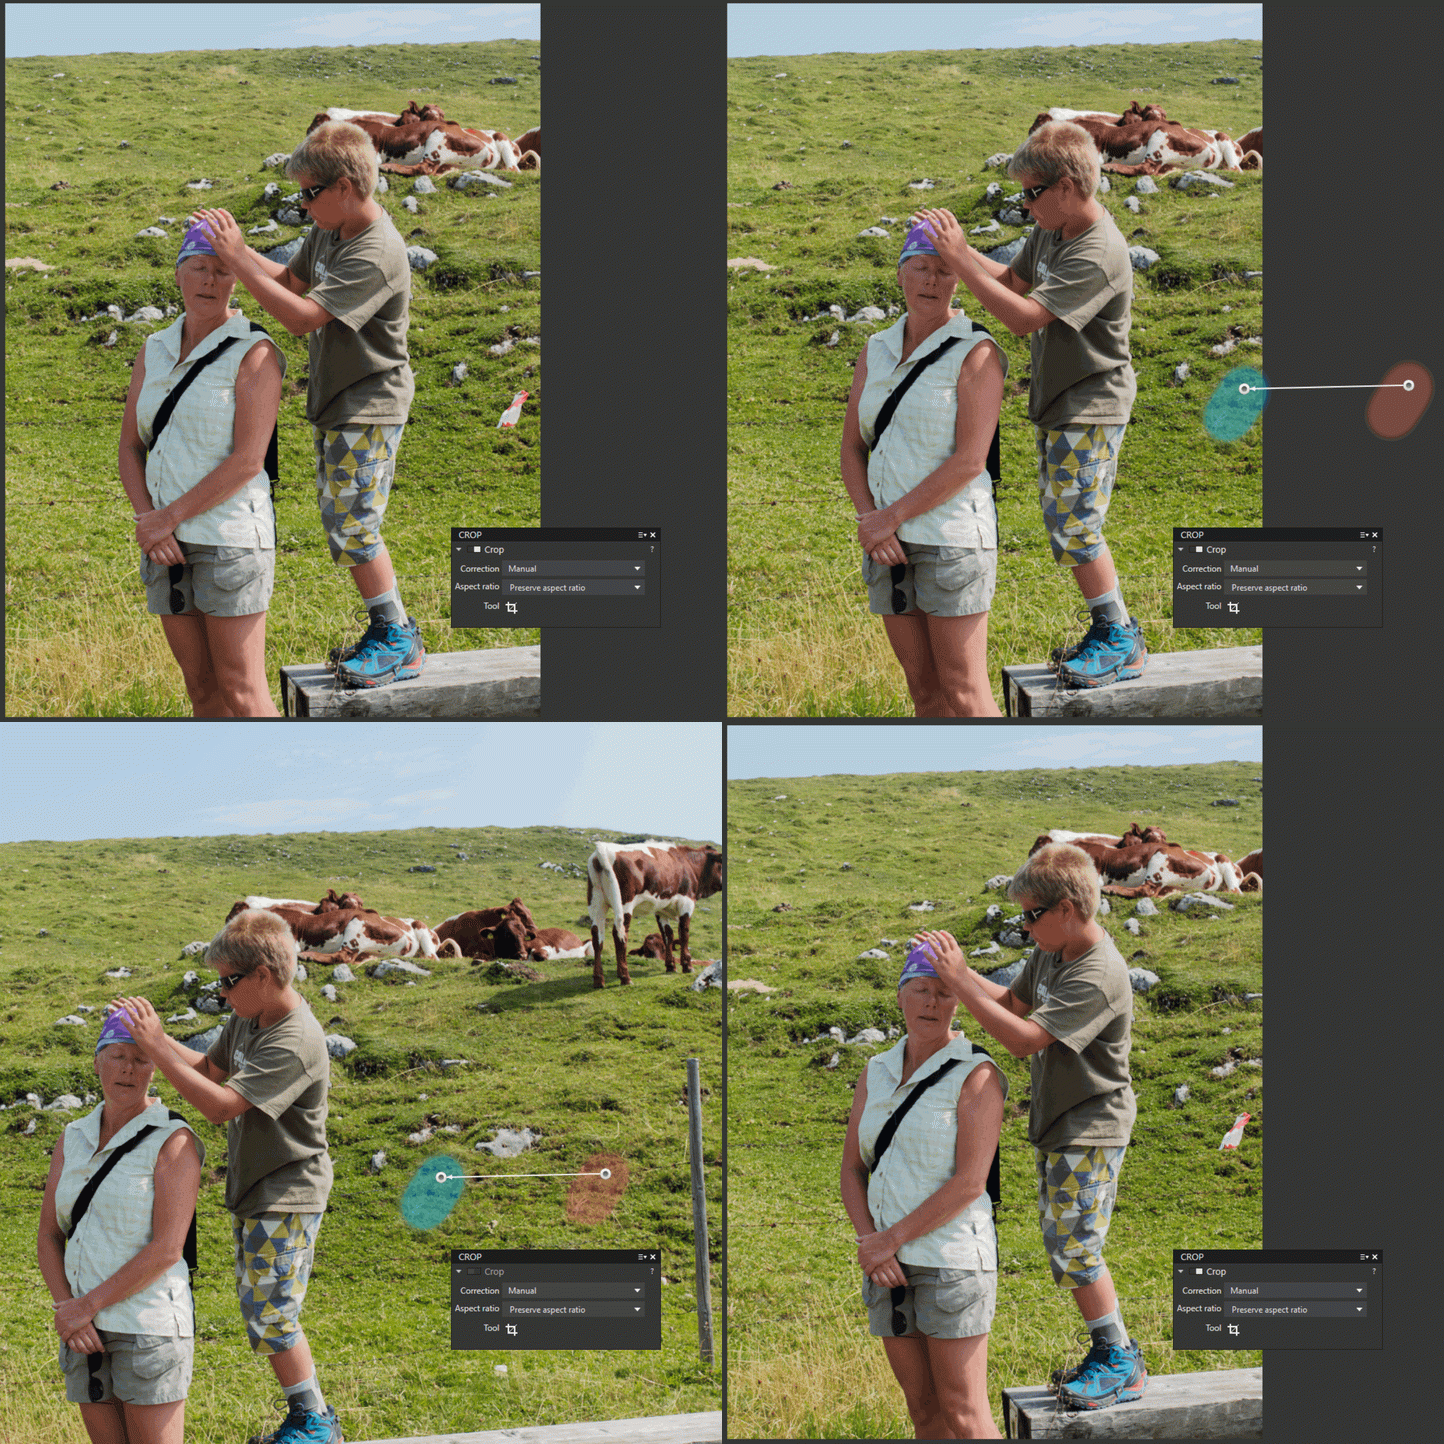
The source area can be taken out of focus in the cropped part of the image.
– Cancel cropping momentarily (illustration)
PhotoLab can choose to automatically pick the source out of the active frame.
Exclusivity DxO; PhotoLab is the only raw development software that use the result of a first correction can be used as a source of the next correction.
The source area cannot be located outside the image (from another image).
It is not possible to fill in the dark areas left by a geometric correction (Horizon or Perspective). See the chapter “The Horizon – Corner recovery“.
The export time increases significantly depending on the area of the replaced image.
Mac OS only.
Masks are independent of the image.
Geometric corrections (horizon modification and ViewPoint features) must be performed before implementing the repair / duplication.
Dust removal
It is wise to create a preset with the sensor dust and stain removal layer. It will be applied systematically to the photos from this camera.
– Apply the “1- DxO Standard” preset so that no custom corrections are applied (and are not reproduced when applying this preset)
– Momentarily activate or force the ClearView effect to overstate the presence of spots
– Clean up the reference photo
– Create a partial preset, e.g. “X – GM5 dust”.
This partial preset can be applied at any time. It activates the Repair function with the layer in memory.
TuToDxO.com – All rights reserved – tous droits réservés.


