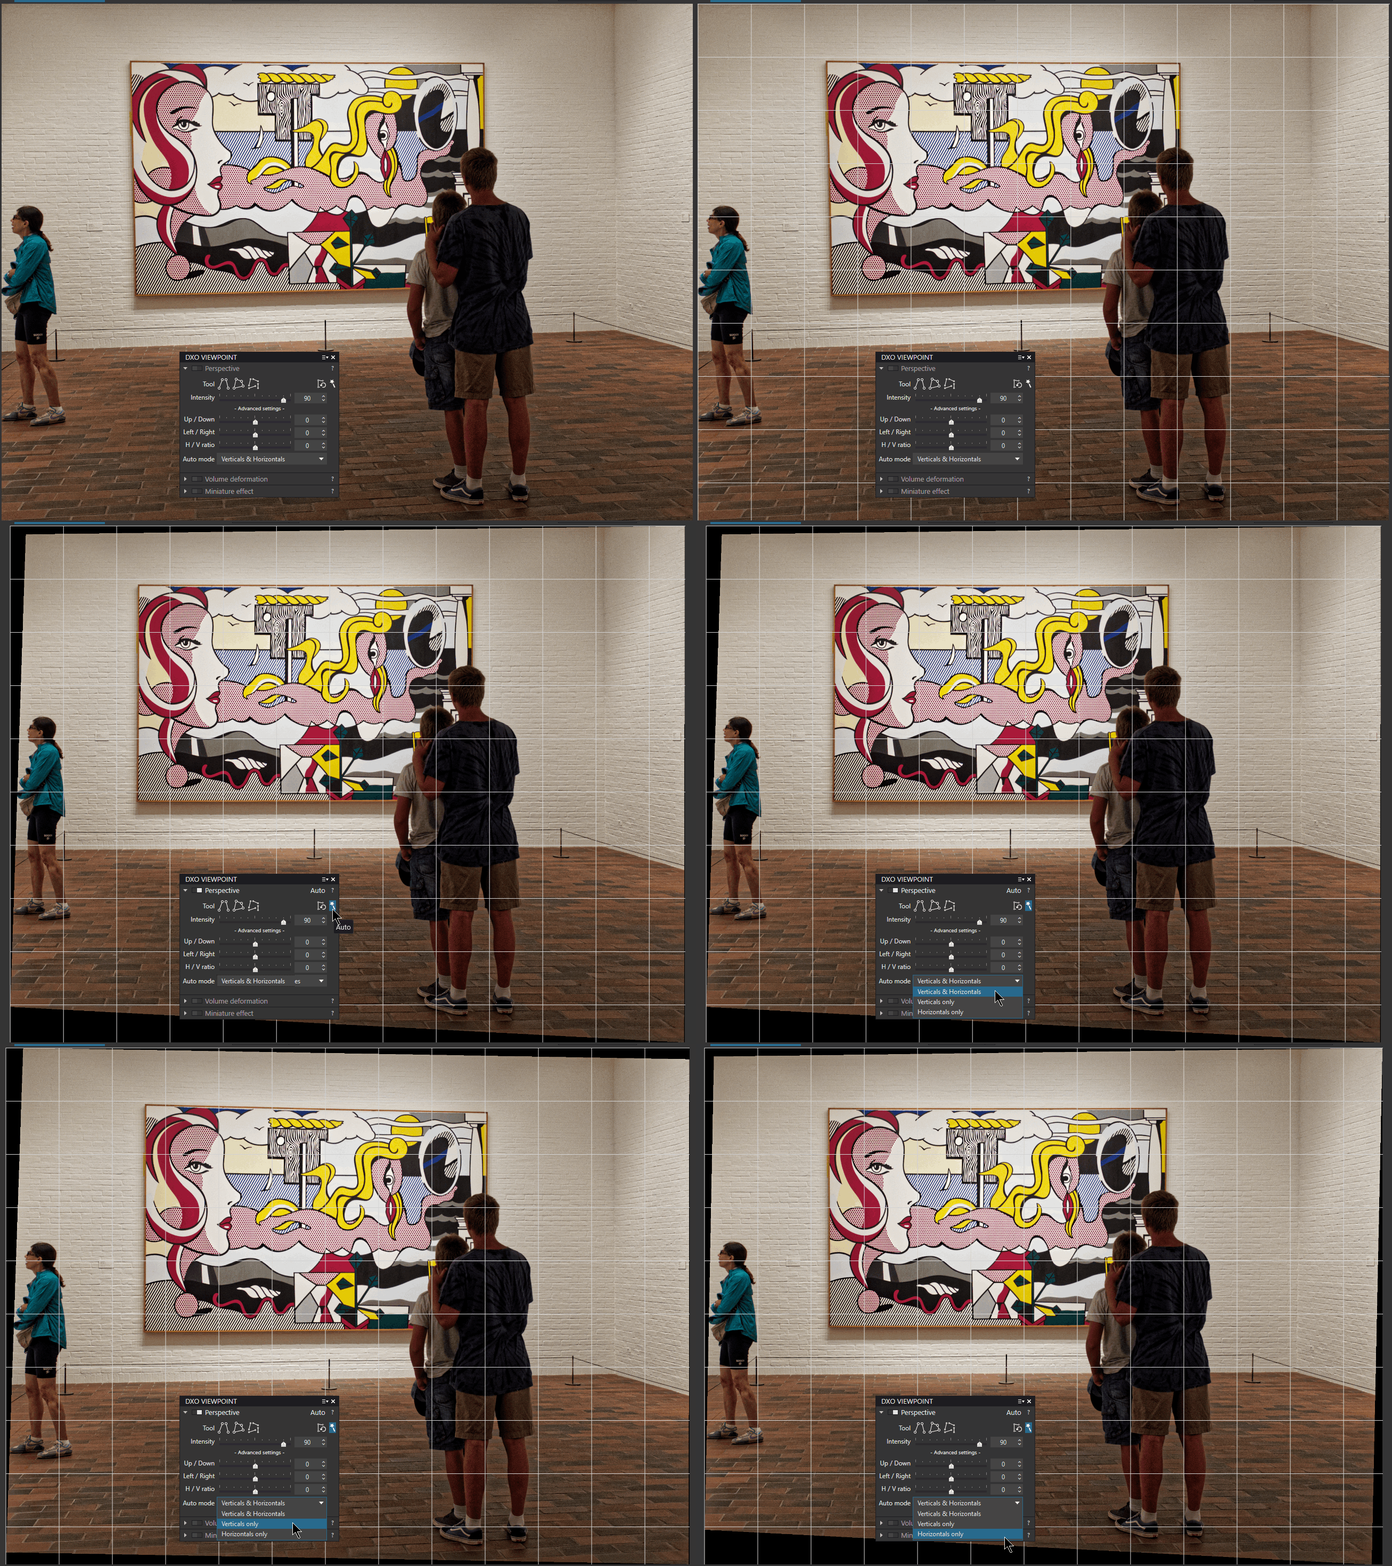
The quality of perspective correction by DxO is remarkable for:
* The precision of its realization benefiting from the cancellation of the optical distortion according to the focal length and the focusing distance
* The reconstitution of the intermediate pixels taking into account the performance of the optics
* The ability to twist the image for complex corrections
* The remedy for volume deformation (anamorphosis) restoring proportions (this ViewPoint functionality requires a separate license)
Perspective correction requires PhotoLab Elite edition.
See the specific tutorial for expert use of ViewPoint, “The Perspective with DxO ViewPoint”

The perspective function is now presented in the Geometry palette.
The illustrations were made with PhotoLab version 5.
– The magic wand proposes the correction automatically. This is often relevant starting point
– The correction Auto Horizon is cancelled (only if it has been done with the AUTO option)
– The intensity is better to be reduced to 90% or 80% for a more natural effect
– The direction of the Auto correction can be limited with the options following horizontals or verticals only (Advanced settings – Auto mode)
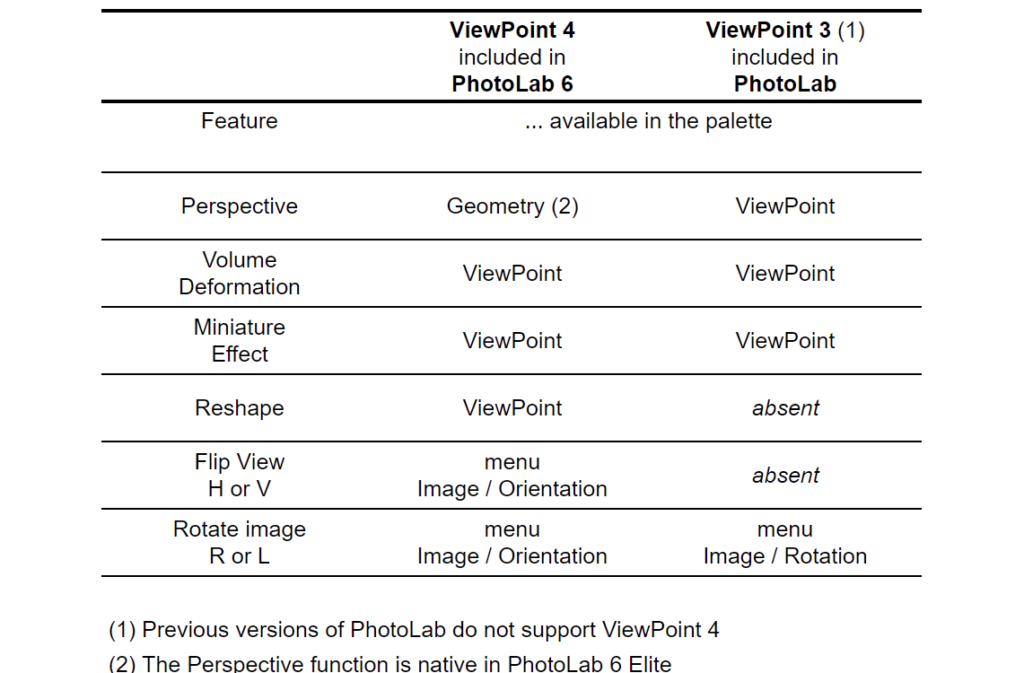
Prior to PhotoLab version 6, perspective correction required an additional license, with DxO ViewPoint providing all the specialized tools.
DxO has updated this software. See the changes at the bottom of the page.
The grid display (Ctrl+ G / G) allows to check the precision of the corrections made.
When making manual corrections, turn off temporarily Auto Crop which causes the image to skip and watch for disappearing parts of the image.
With very wide angle lenses, Volume Distortion can sometimes be countered by correcting Distortion in the “Geometry” palette.
– Reduce distortion correction – Do NOT cancel it
– Disable the “Keep aspect ratio” option
The H / V ratio can be diverted in order to refine the silhouette of the model in full-length plan.
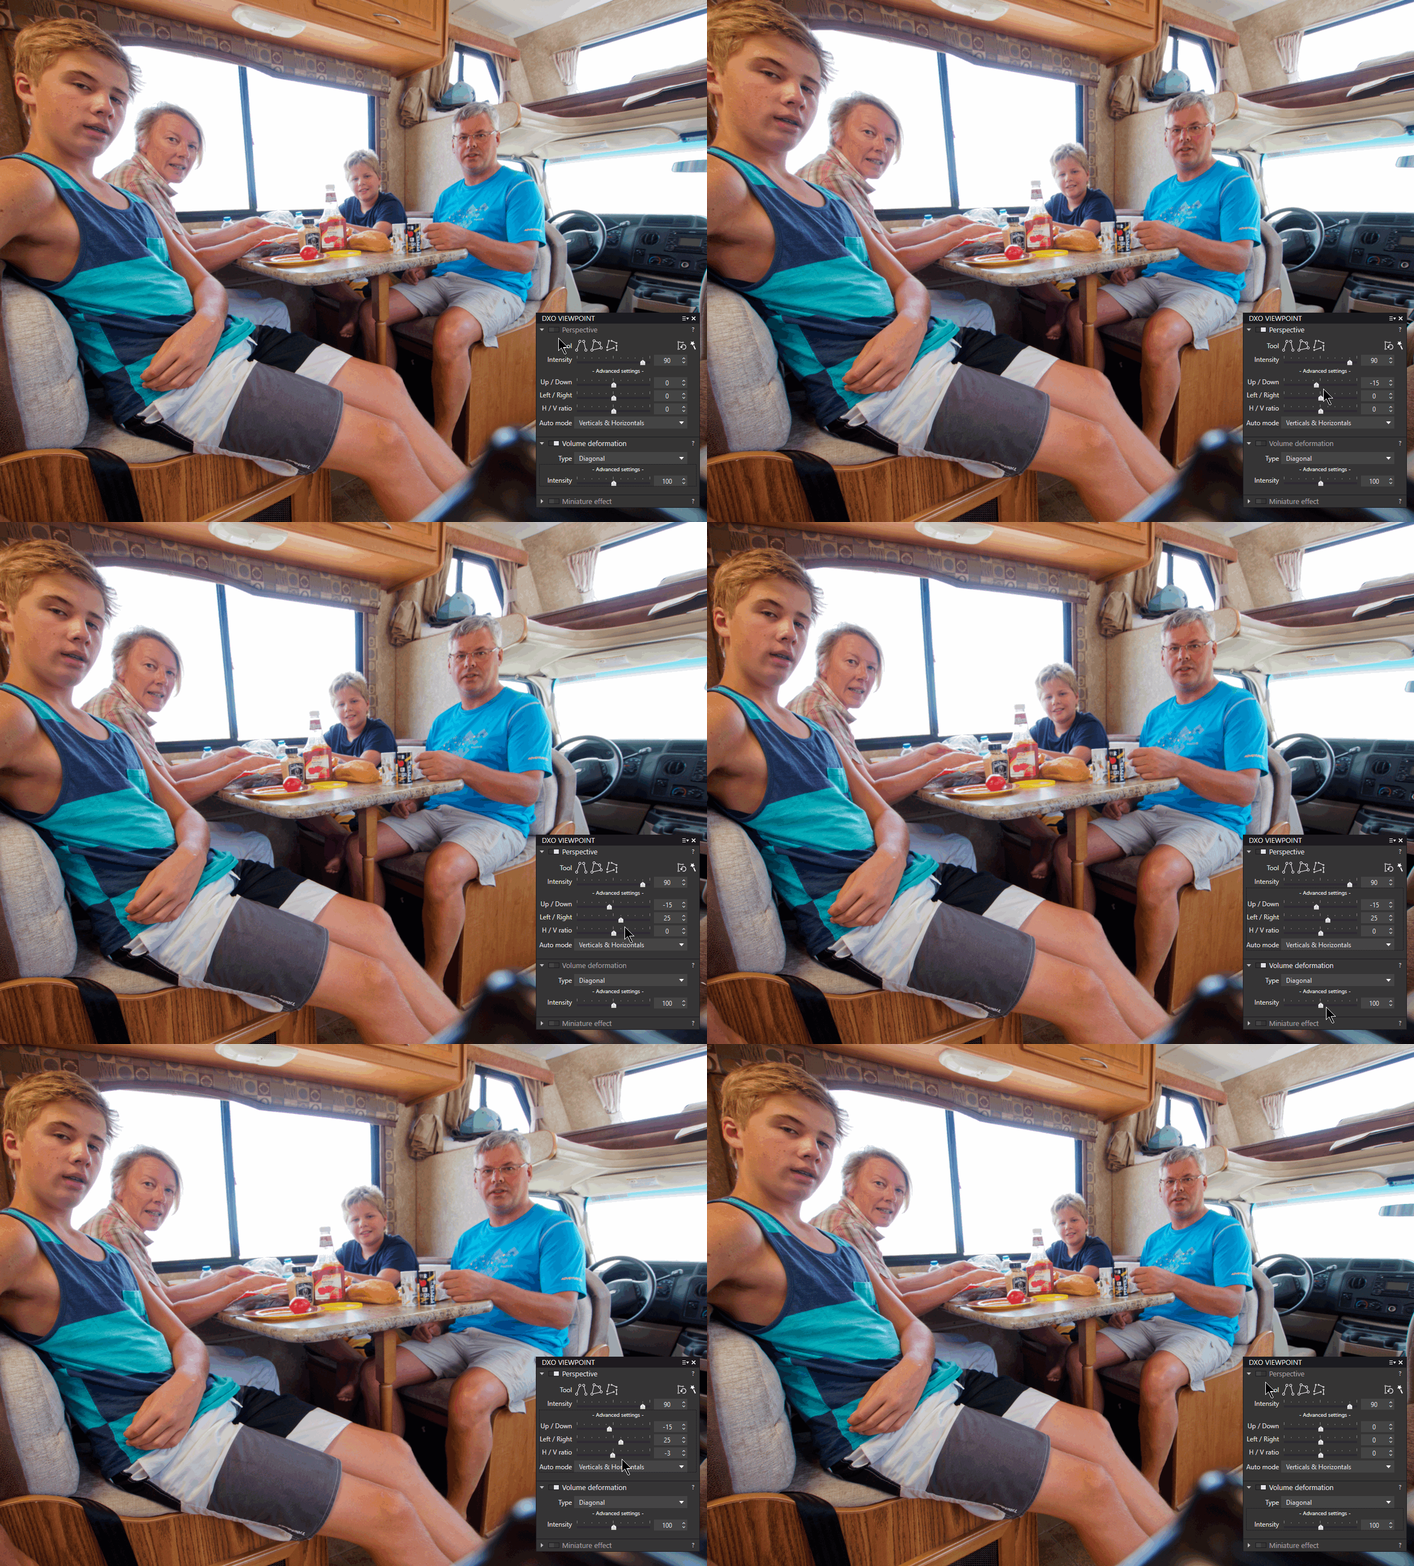
Correcting Perspective is also useful for countering high-angle / low-angle effects, very visible with wide angle lenses, and restoring the proportions of characters on different planes.

Commentary on the methodology applied to the illustration:
– Up / Down tilt correction: -15 to straighten characters
– Right / Left tilt correction: +25 to balance proportions
– Volume deformation (diagonal): 100%, the default value of 150% is too large
– Refine the characters who “settle” a little, H/V ratio: +3 (make sure to set a very low value)
Note that since PhotoLab 6 these corrections are spread over two palettes, Perspective (Geometry palette) and Deformation (ViewPoint palette).
It is not useless to (re)create a dedicated palette.
I often use the lateral tilt correction to restore the proportions between peoples located on two different planes. Especially with children of different ages.
The perspective correction transforms the rectangular image into a trapezoid.
The method to recover material for an optimized image is presented in the previous article “The Horizon“.
Note the general image orientation functions.
– Contextual menu – Right click on the image / Transform
– Rotate to 90° on left or right (Ctrl+ L or / Cmd+ L or R)
– Flip Horizontally or Vertically (with the ViewPoint plugin)
Image flipping is finally available in PhotoLab, but it requires the ViewPoint 4 license. At the same time, the Perspective function is integrated into PhotoLab Elite at no extra cost.
On the one hand, a “basic” feature requires a plugin … which has lost its core function.
Who will be satisfied with ViewPoint 4?
* Before the release of DxO Viewpoint 4, perspective correction was available through a dedicated license, DxO Viewpoint
* PhotoLab 6 Elite now offers this correction making the purchase optional
* Additional functions concerning perspective effects (mainly Volume distortion) still require the purchase of this dedicated license, DxO Viewpoint
* DxO Viewpoint 4 is not supported by previous editions of PhotoLab (version 5, …)

TuToDxO.com – All rights reserved – tous droits réservés.


