Sommaire
TuToDxO.com is currently being updated for PhotoLab 7.
It will soon be completely redesigned.
You’ll find the new features here.
Local adjustments in palettes
Farewell to the old equalizer… Welcome to Local Adjustment palettes.
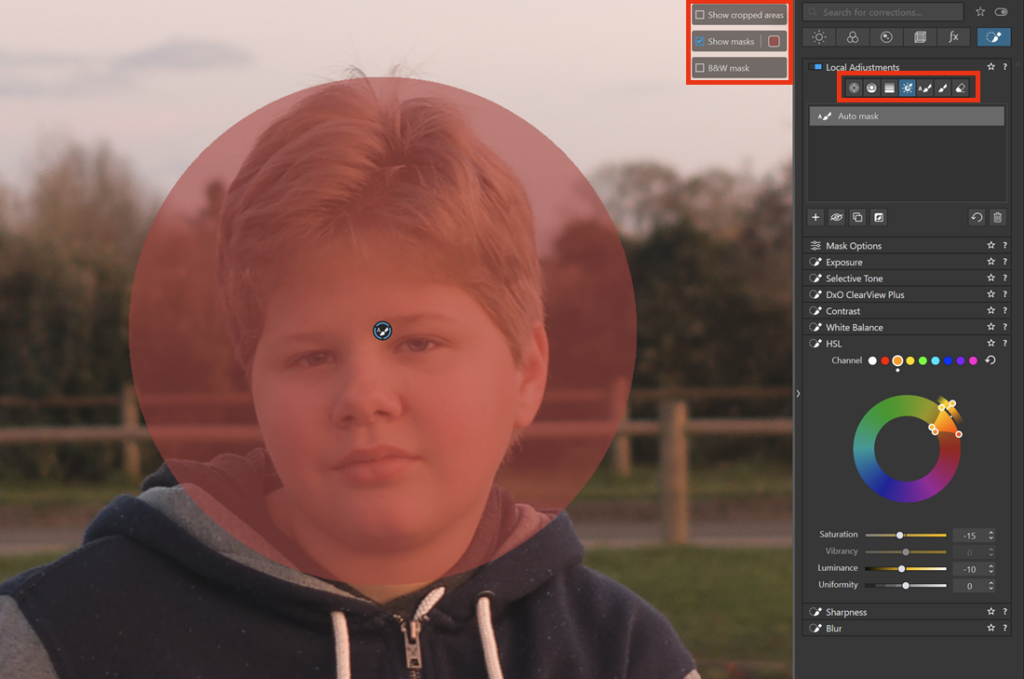
The mask display has been redesigned with three new buttons.
* Permanent display (same as M button)
* Its color and transparency can be modified
* It can still be isolated in B&W (see note below)
* The full image remains visible if cropped
In addition to these buttons
* The mask appears when the cursor hovers over the mask name or indicator (even if inactive). A mask template must be activated.
Local HSL correction arrives.
There’s no Hue picker as in the Global version.
The B&W display of the mask overrides the colored version and presents the information in reverse:
– The B&W version shows only the mask, the inactive part being invisible (black)
– The colored mask is superimposed on the image, with the inactive part remaining unchangedThe chosen color is common to all mask types.
B&W display of brushed masks is irrelevant.
The mask display makes it impossible to see the action of the sliders.
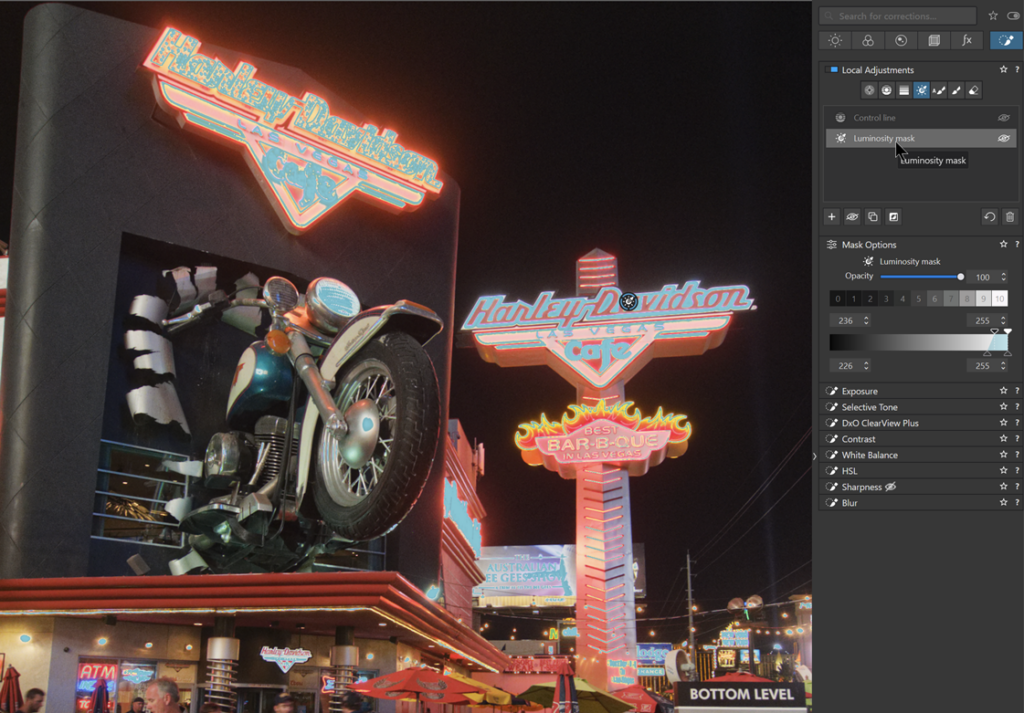
Luminosity mask
The new Luminosity mask allows precise selection of the zones corresponding to a given brightness range.
– Use the eyedropper to select an area of the image to create a new mask OR
– Select one of 11 predefined zones based on the Ansel Adams zone system
– Complete or limit the mask with the brush or eraser
– Refine the area of application by using the trapezoid tool to add light or dark areas, then adjust the transition.
This mask will probably be more useful for black & white work than color.
A FilmPack 7 license is required to access this mask.
Colors Accentuation
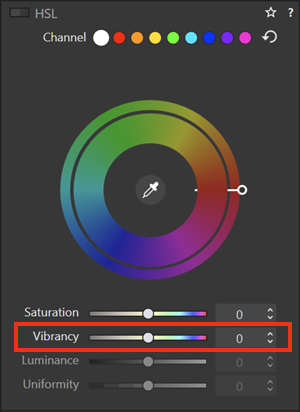
The Accentuation palette is replaced by the HSL palette.
The Vibrance slider is only accessible on the main channel (white disk).
New generic renderings
The Color / B&W Rendering (the tool’s new name) features a B&W switch that proposes the appropriate renderings.
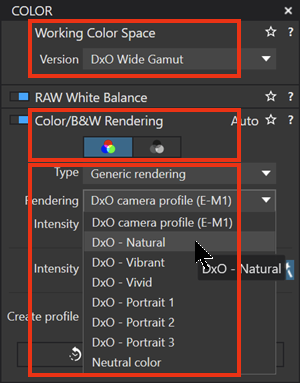
New renderings (6 for color – 3 for B&W) are offered in addition to the camera rendering and the neutral rendering:
Natural – Vibrant – Vivid – Portrait 1, 2 et 3 // N&B Faded – Balanced – Strong
* DxO Natural rendering is a new approach to DxO style, more pronounced than the old Neutral color
* Switching to DxO Vibrant increases saturation (especially reds) but reduces contrast and slightly lowers overall exposure
* DxO Vivid rendering (more acid than vivid for my taste) brightens mid-tones and shadows
* DxO Portrait 1 is a little warmer than Neutral Color, but with more contrast
* Portrait 2 and 3 renderings act on the red, darkening or lightening it
* Neutral color is always available. This is a slightly flatter image with less contrast. In some cases, this rendering gives a little more detail, and blacks and shadows are not too dark
These renderings are only available with the Wide Gamut extended color space.
The default “1-DxO Standard” rendering remains that of the camera.
Warning: toggling between color and B&W modes resets the previous choice to the generic Neutral Color rendering (instead of the camera’s).
Channel mixer now available in PhotoLab Elite
This Black & White rendering optimization feature, previously only available with the FilmPack plugin, is now native to the DxO PhotoLab Elite version.
– Switch to Black & White
– Vary channel sensitivity
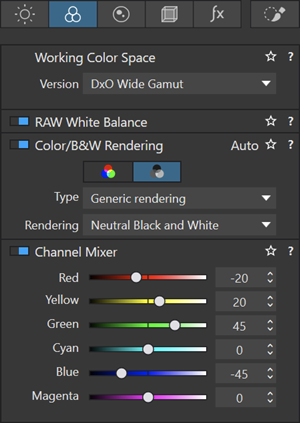
* Use red to change sky density and detach clouds
* Use green and yellow for foliage
* Use the blue to soften the sky and give a dramatic impression
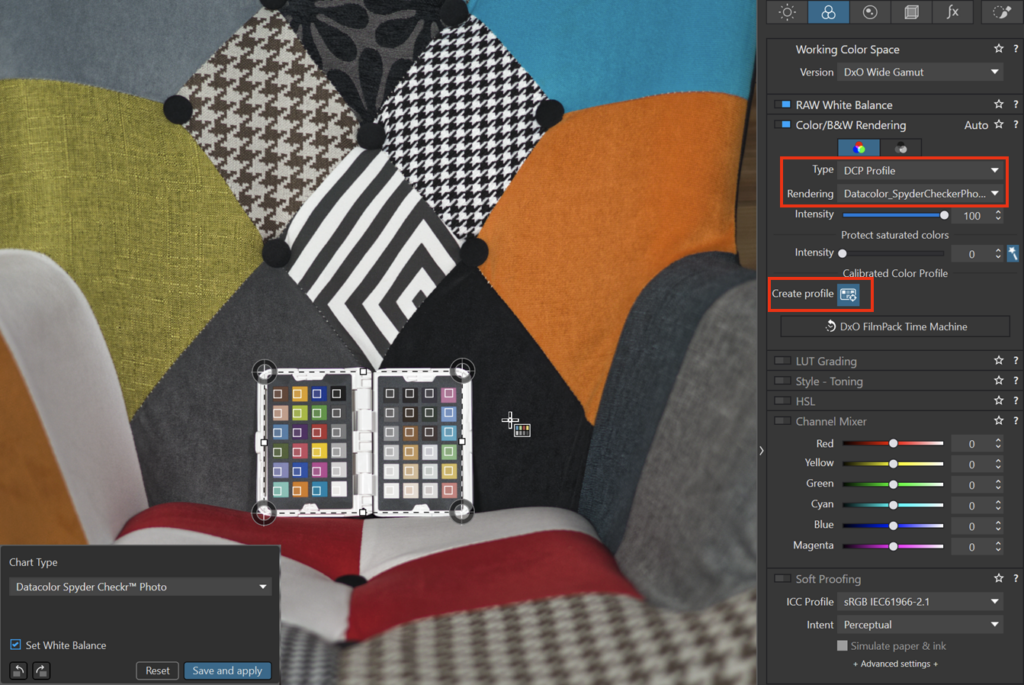
Create a calibrated color profile
A new tool lets you create a DCP (Digital Color Profile).
Six Calibrite and Datacolor color charts are currently recognized:
* Calibrite: ColorChecker Passport Photo 2 – ColorChecker classic
* Datacolor: Spyder Checker – Spyder Checker 24 – Spyder Checkr Photo – Spyder Checkr Photo 24
With one click, the profile is created and applied with the correct white balance.
– Have a photo with one of the charts supported
– Open the tool from the Color Rendering / B&W palette
– Select charter template
– Draw the frame above the chart in the photo, adjusting the markers in the corners
– White balance is automatically adjusted
– Save and apply profile when charter is recognized
The profile file (Nom_photo_date.dcp) is created in the photos folder.
The profiles created can be accessed for the rest of the images in the series via
– Option Type: DCP Profil – Choose a profil OR
– Copy / Paste selected corrections: Color / B&W rendering
Only available in Wide Gamut Color space.
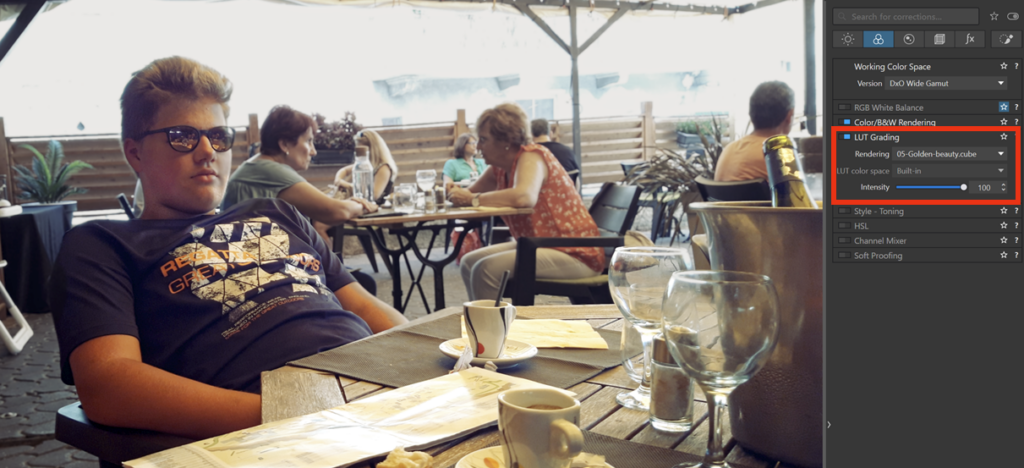
Support for LUTs
LUTs (Look Up Tables) are used to color images to match specific renderings.
LUTs are not a substitute for full presets, color rendering schemes, etc. It’s an additional color adjustment.
This means that LUTs can be applied in addition to any particular color rendering selection, unlike DCPs, which are alternatives to the original colors.
* LUTs are color tables that enable typical rendering without any changes to palettes
* LUTs (.cube or .lut formats) are shared with other software programs
* Applied to a B&W image, they are similar to toning
LUTs are only available with PhotoLab Elite and only in Wide Gamut Color space.
Free LUTs are available here and there.
Pay attention to color space!
A LUT is created in a given color space. The LUTs proposed by DxO have been created in the DxO Wide Gamut working color space.
Most of the LUTs available on the Web have been created in the sRGB color space. In fact, they rarely contain this information.
This function is only available in DxO’s Wide Gamut color space. However, it is essential to select the appropriate LUT color space to obtain the correct values, otherwise the colors in your image will be different from those for which the LUT was designed.
The LUTs supplied by DxO have been produced in the wide color space, which is why the menu is grayed out.
FilmPack7
* New Black & White effects
* New textures and frames
* New digital and analog renders, mainly Nikon N-x
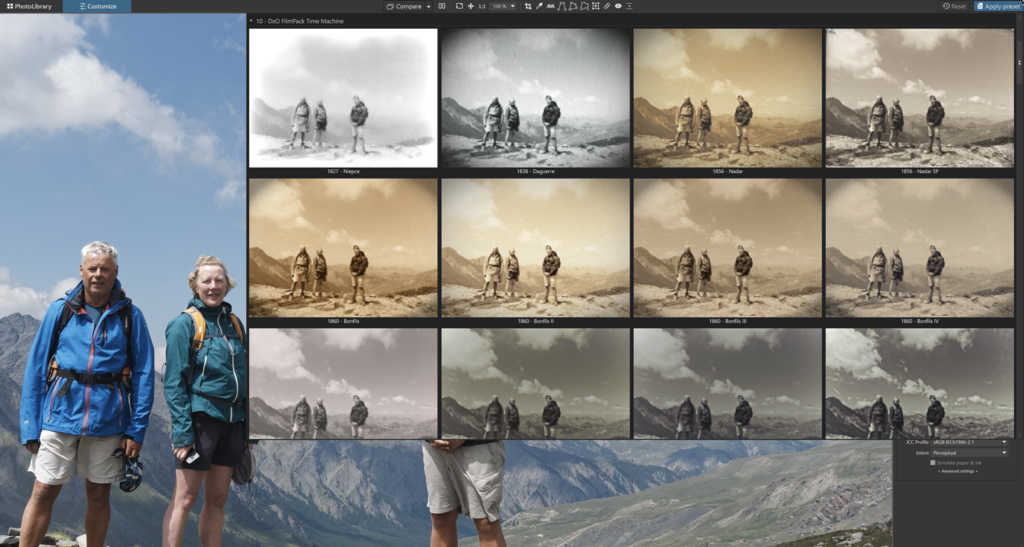
* New preset structure 10- DxO FilmPack Time Machine.
This list includes all presets highlighted in Time Machine.
Time Machine is a context-sensitive presentation of FilmPack presets, some of which are displayed several times. This is not the case for the preset structure.
Please note that some presets treat the photo as athe Legacy color space.
Will FilmPack be regularly updated?
The FilmPack plugin increases the price of the PhotoLab solution … but pays for itself over time. It took seven years for DxO to update it.
FilmPack 6 (released in 2021) provided Fuji rendering. You’ll have to buy a major version to get Nikon rendering!FilmPack 7 enriches Local Adjustments with the luminosity mask, but it is no longer required in PhotoLab 7 to benefit from the channel mixer.
TuToDxO.com – All rights reserved – tous droits réservés.

3 Comments
Boris · 2023,October 5 at 6:59 pm
I wonder if you can elaborate on how to manage colour spaces when using LUTs crated in programs that don’t use DXO wide gamut space. Thanks.
Volker · 2023,October 6 at 10:08 am
Danke für eure Zusammenfassung, das war sehr hilfreich. Ich bin gespannt auf die Neugestaltung dieser Seite.
Freundliche Grüße aus Deutschland / NRW
Pascal Pelé · 2023,October 6 at 2:48 pm
Hi Boris and Volker
Thank you for your confidence.
When working in Wide Gamut mode, you open a LUT and choose the color workspace for it in the bottom line.
Pascal
Comments are closed.