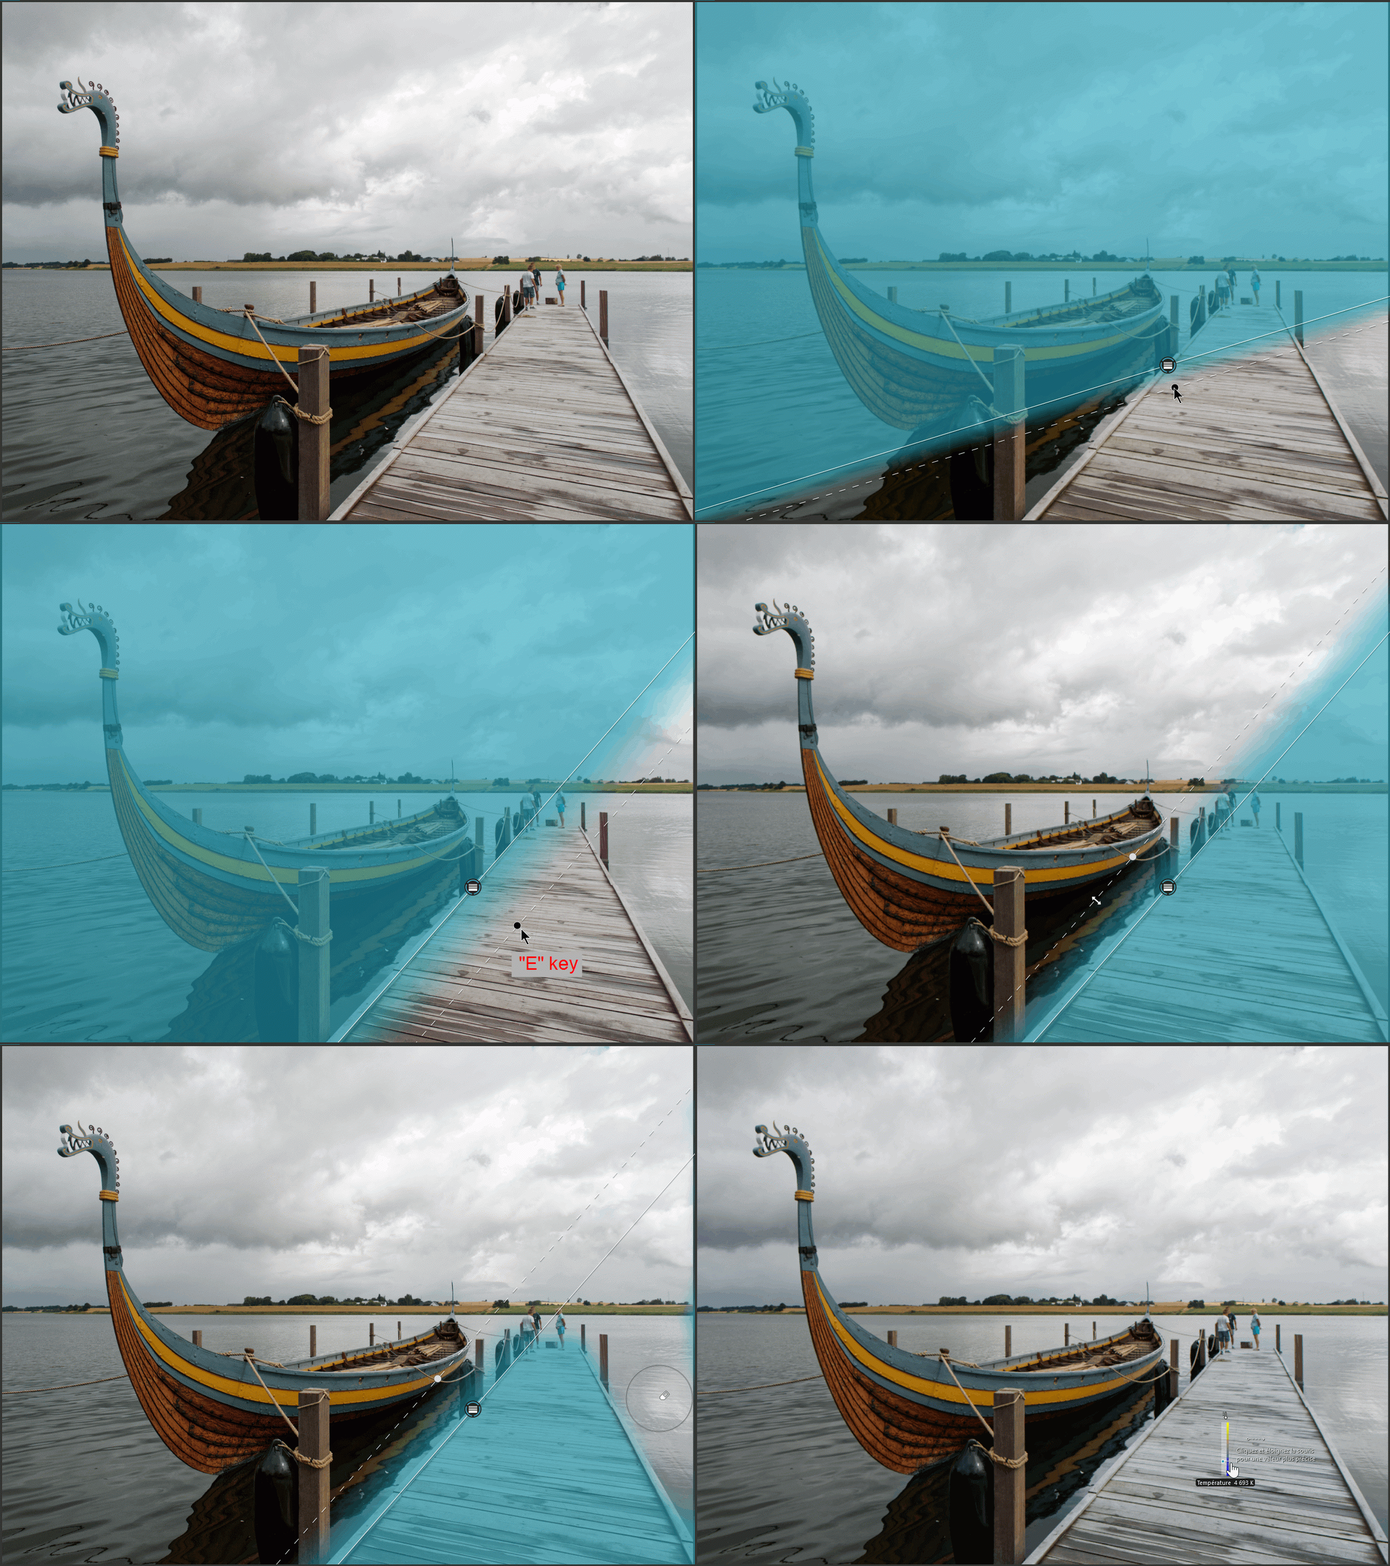
The Graduated Filter is a mask that separates the image into two areas. It is determined by two parallel straight lines delimiting the transition zone of the retouch, from 100% opacity to 0% on the other.
This mask is perfectly adapted to the sky which can be darkened, saturated or colored.
This mask is done in two steps.
– Right Click on the image opens the Radial menu
– Select the Graduated Filter- Left Click on the image to determine a point of the border 100% opacity (continuous line)
– Hold down the mouse button and drag the second line
– The movement moves the second border away, at wich 0% opacity applies (dotted line) and orients the whole
The position of the lines is changed in the same way as the control line.
See the
tutorial Control Line for a description of the method.

However, the border is not always the horizon. It can be adapted to the image:
– Activate a previously created “Gradient Filter” mask
– Choose the brush with the Radial menu and complete the mask
– Choose the eraser with the Radial menu and blend the mask – see the end of the illustration
– Switch from one to the other by pressing the key Win: Alt / Mac: OPTION
The equalizer can prevent access to the handle when the lines are oriented to approximately 45°.
– Hide it temporarily (key E / I)
TuToDxO.com – All rights reserved – tous droits réservés.


