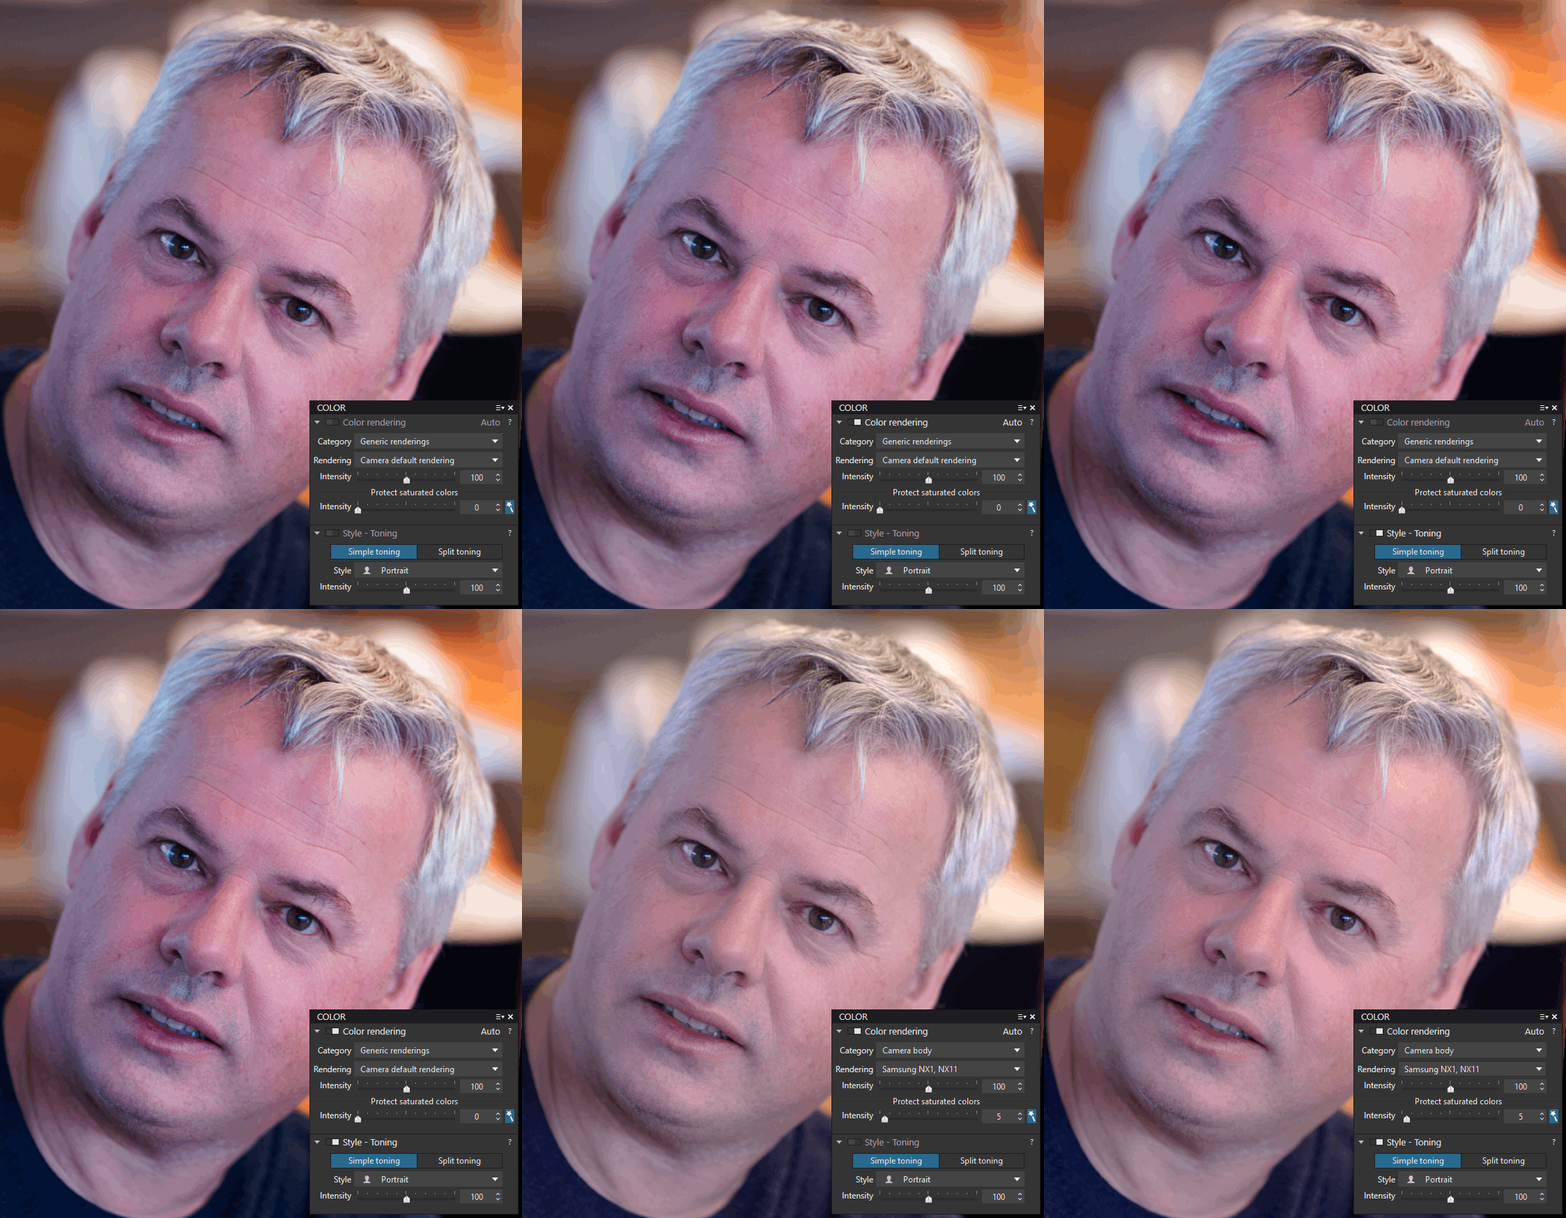
Color rendering in the “Color” palette has several areas of intervention.
* Either DxO takes into account the specificity of the camera.
With “1- DxO Standard” preset, PhotoLab tries to reproduce on raw pictures the default color rendering applied by camera maker on its camera JPEG files (which varies from one camera model to another).
* Either PhotoLab standardizes the rendering of the images. It is a colored proposal according to the “DxO typicity” independently of the particularities of the camera.
The camera is calibrated twice to get homogeneous results. They proposed in “Color Rendering”.
* Finally, PhotoLab delivers images with neutral or even faithful colors (read DxO’s explanations at the end of the article).
– Generic Renderings / DxO Camera profile (xxx)
This is the Camera rendering, whose particular tone is respected. In PhotoLab, the result of the corrections varies depending on the particular tone of the source.
– Generic Renderings / Neutral color, neutral tonality
The application of one of the renderings; “Neutral colors, neutral tone” (version 1 and 2) gives smoother images by getting rid of them from the special “DxO” rendering.
They render the colors faithfully.
The preset “3 – Neutral Colors” uses rendering “Neutral tone v2”.
The rendering “Neutral color, realistic tonality (gamma 2.2)” is recommended for images intended to be used in editing software.
– Generic Renderings / DxO Portrait
This rendering softens skin tones and brighten the skin.
Finally, “Protect Saturated Colors” allows keeping details in areas with saturated colors at the limits of the clipping.
DxO distinguishes two aspects when modifying the color rendering.
– The treatment of the hue and the saturation of the colors
– The modification of the luminosity and the contrast of the image
The various renderings dissociate the application of these treatments.

Special case for Fuji X-Trans
– Generic Renderings / From camera (xxx)
The rendering selected on the camera at the time of shooting is detected and activated.

* First activate the option, Settings / General / Automatically use Fuji camera rendering.
* Auto detection only works the first time new images are loaded. Otherwise, you have to activate it manually.
* With the FilmPack Elite plug-in, all 19 Fuji digital renders are available and interchangeable.
They are in the category / Digital Film – DxO FilmPack.
These renders are available for all camera brands.
– Camera Body / xxx
Simulates camera JPEG file rendering of another type of Digital Camera (DC) according to proprietary algorithms (“standard” style only) to standardize the rendering of a report made with different DCs.
This rendering makes it possible to benefit from the character of a DC (E.g: give standard JPEG rendering of an EOS-5D II to photos of a D-800).
BEWARE of confusion. It is useless to indicate the reference of your body since it is taken into account by the Generic Rendering “DxO Camera profile”.
According to my taste.
– The rendering of the Samsung NX1 respects the skin tones.
– The “Color positive films” rendering Provia from Fuji for faithful colors
– DCP profile (Digital Color Profile)
The procedure for creating these color profiles with Adobe DNG Profile Editor and a ColorChecker are 3rd party softwares from DxO. They are available on these sites: ,
Partial presets provided by PhotoLab include some of the renderings:
| Neutral Colors | Contrast – | Rendering: neutral colors V2 | Vibrancy + |
| Portrait standard | Contrast + | Rendering: DxO Portait | Vibrancy +++ |
| Landsape standard | Rendering: Minolta 5D | Vibrancy ++ |
The “Style – Toning” function among other offers two styles:
* Portrait, unlike the homonymous Rendering reinforces the flesh tones.
Please mind not to combine it with the Portraits rendering, the flesh tones are faded
* Landscape, reinforces green hues and saturates the sky.
Also enhances the orange hues on sunrises / sunsets.

Do not neglect the contribution of the film categories (wider choice with the FilmPack plug-in) especially the Fuji positive films.

Practical application of a FilmPack film rendering:
Flowers can be given their complexion using sunlight and a black cardboard, in the shade, as a background.
Photo processed in DXO with addon FilmPack Fuji Velvia (just choose different options to see the final result).
The Velvia look lifts and saturates the reds-orange that tend to be rather washed out in this type of flower.
According to DxO:
1- “Camera Default rendering” is calibrated to reproduce the default color rendering applied by the camera maker on its camera JPEGs. For most cameras, this default color rendering provides quite saturated colors, and pictures with a high contrast.
2- So to provide more faithful results we added color rendering called “Neutral color, realistic tonality (gamma 2.2)”.
The colors obtained in the final picture and displayed on a calibrated screen are close to what a spectrometer would measure by observing the original photographed scene. However our visual system doesn’t find such color rendering pleasant in terms of contrast.
3- That’s the reason why we derived towards the color rendering called “Neutral color, factory tonality”, by keeping the way it renders hue and saturation of colors of the photographed scene, but taking from “Camera Default rendering” (According to the manufacturer’s signature) for the way it handles luminosity and contrast.
4- Some people find obtained contrast often too aggressive (especially, it has a tendency to make dark areas too dark, and bright areas too bright).
We therefore propose “Neutral color, neutral tonality” rendering (and its subtle variation “v2”), by changing just part handling luminosity and contrast, making it this time independent from camera with which picture was shot, and with a moderated contrast (especially, dark areas are rendered less dark, “v2” offering an intermediate effect about this).
Finally, we introduced a “DxO Portrait” rendering, designed to make pleasant colors especially on skin.
TuToDxO.com – All rights reserved – tous droits réservés


