Sommaire
The Luminosity Mask collects all the pixels in the same brightness range throughout the image.
It easily discriminates between very small areas of pixels scattered throughout the image.
It is possible to add (brush) or subtract (eraser) areas that are to receive the same correction.
It is intended to replace Selective Tone for very precise corrections.
This allows you to adjust the highlights in different ways, as well as recovering the shadows.
This mask is used to extract detail from deep shadows in specific areas without distorting the rest of the image.
It does not have the selection latitude of the Control Line. It is more selective in its area of use.
Edge management is more subtle than with the Control Point.
A FilmPack licence is required for this mask.
Application
– Select the Luminosity Mask
– Move the pipette to define the reference zone OR
– Select one of the 11 fractions of the light range
– Modify the selectivity trapezoid, graphically or numerically
– Select the brush to paint an area not automatically collected
– Select the eraser, or press the Alt key to limit it
The natural correction to apply to this mask is exposure, but all the corrections are applicable.
* Note that the default name of the mask is enriched with the word “\ Brush”.
* A Revert mask to original icon appears. This allows you to erase manual collection zones without using the history.
Procedure

Illustration procedure:
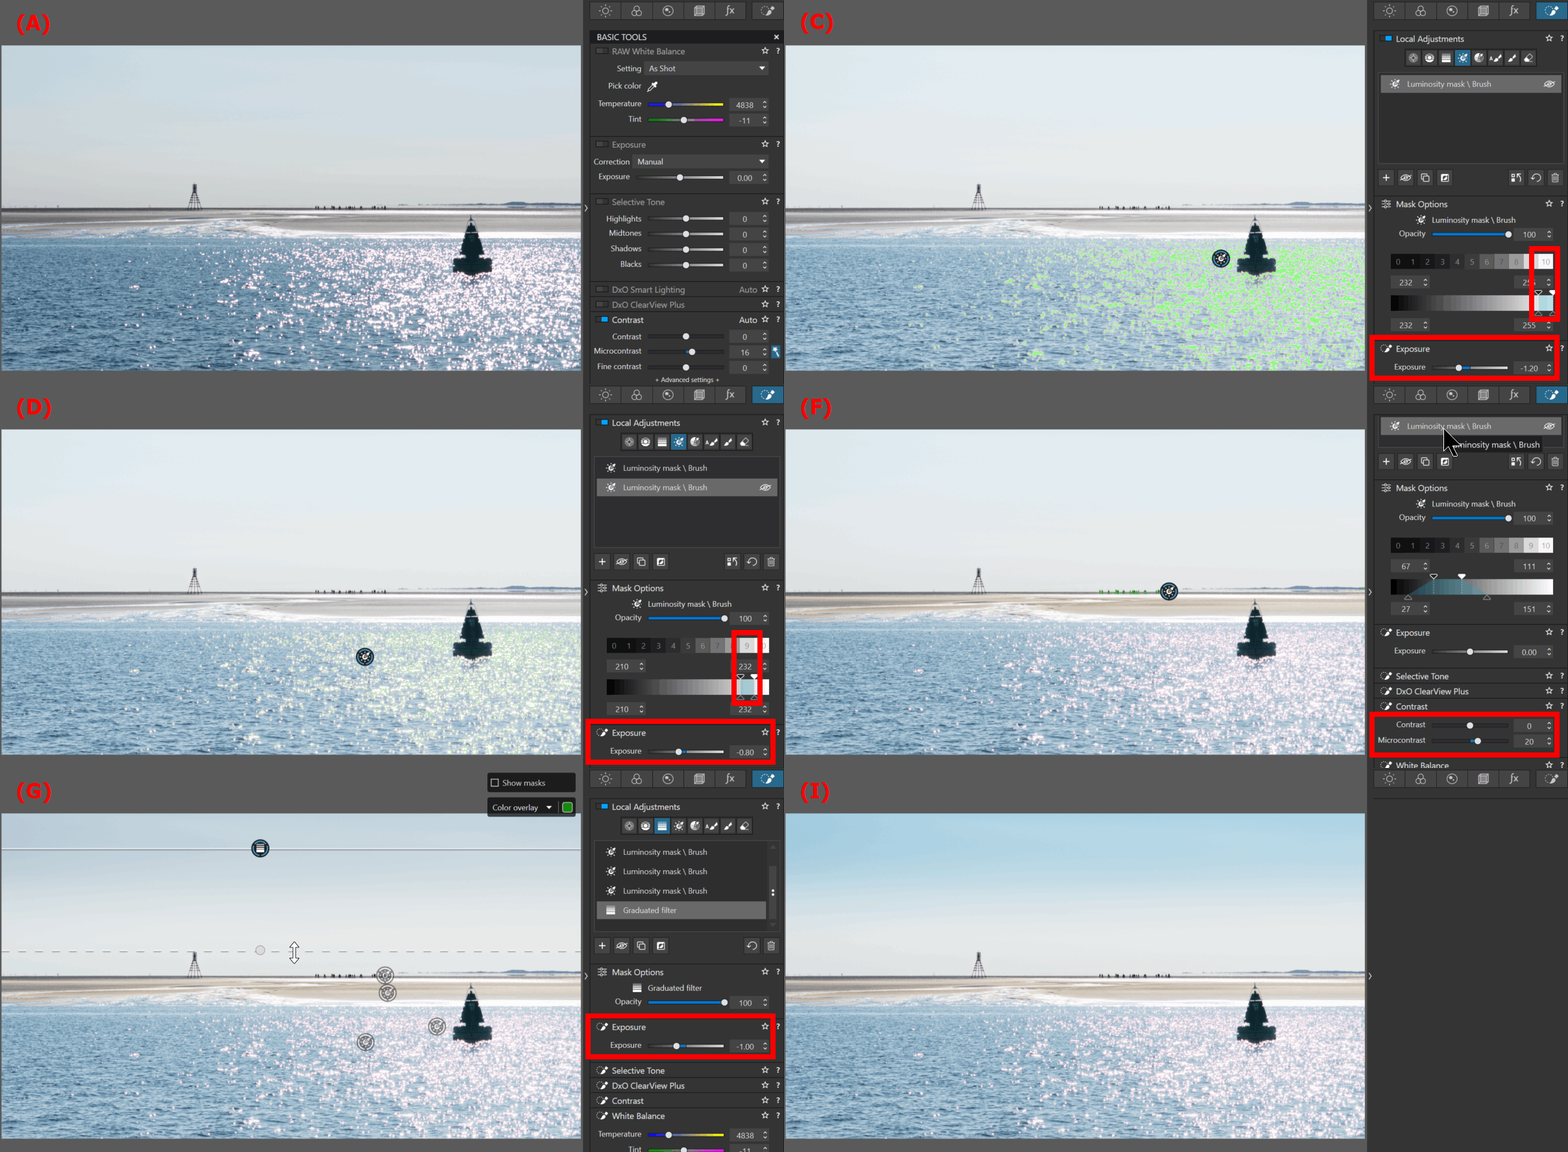
– Photo of a strong backlight, the reflection on the water is too bright (A)
– The image benefits from being even clearer; global exposure correction +1 EV (B)
All the following masks have been cleaned (erased) to limit the choice to the desired area; the shiny reflections or the sand.
– First Luminosity mask; Exposure -1.2 EV on zone 10 (C)
– Second Luminosity mask; Exposure -0.8 EV on zone 9 (D)
– Turning sand yellow by warming up the White Balance to 7000K (E)
– Highlight the walkers; select by clicking then microcontrast +20 (F)
– Graduated filter to darken the sky; Exposure -1 EV on zone 9 (G);
– Cooling the cool grey sky to blue; White balance to 4000K (H)
– Result for a well-balanced image (I)
Zone System
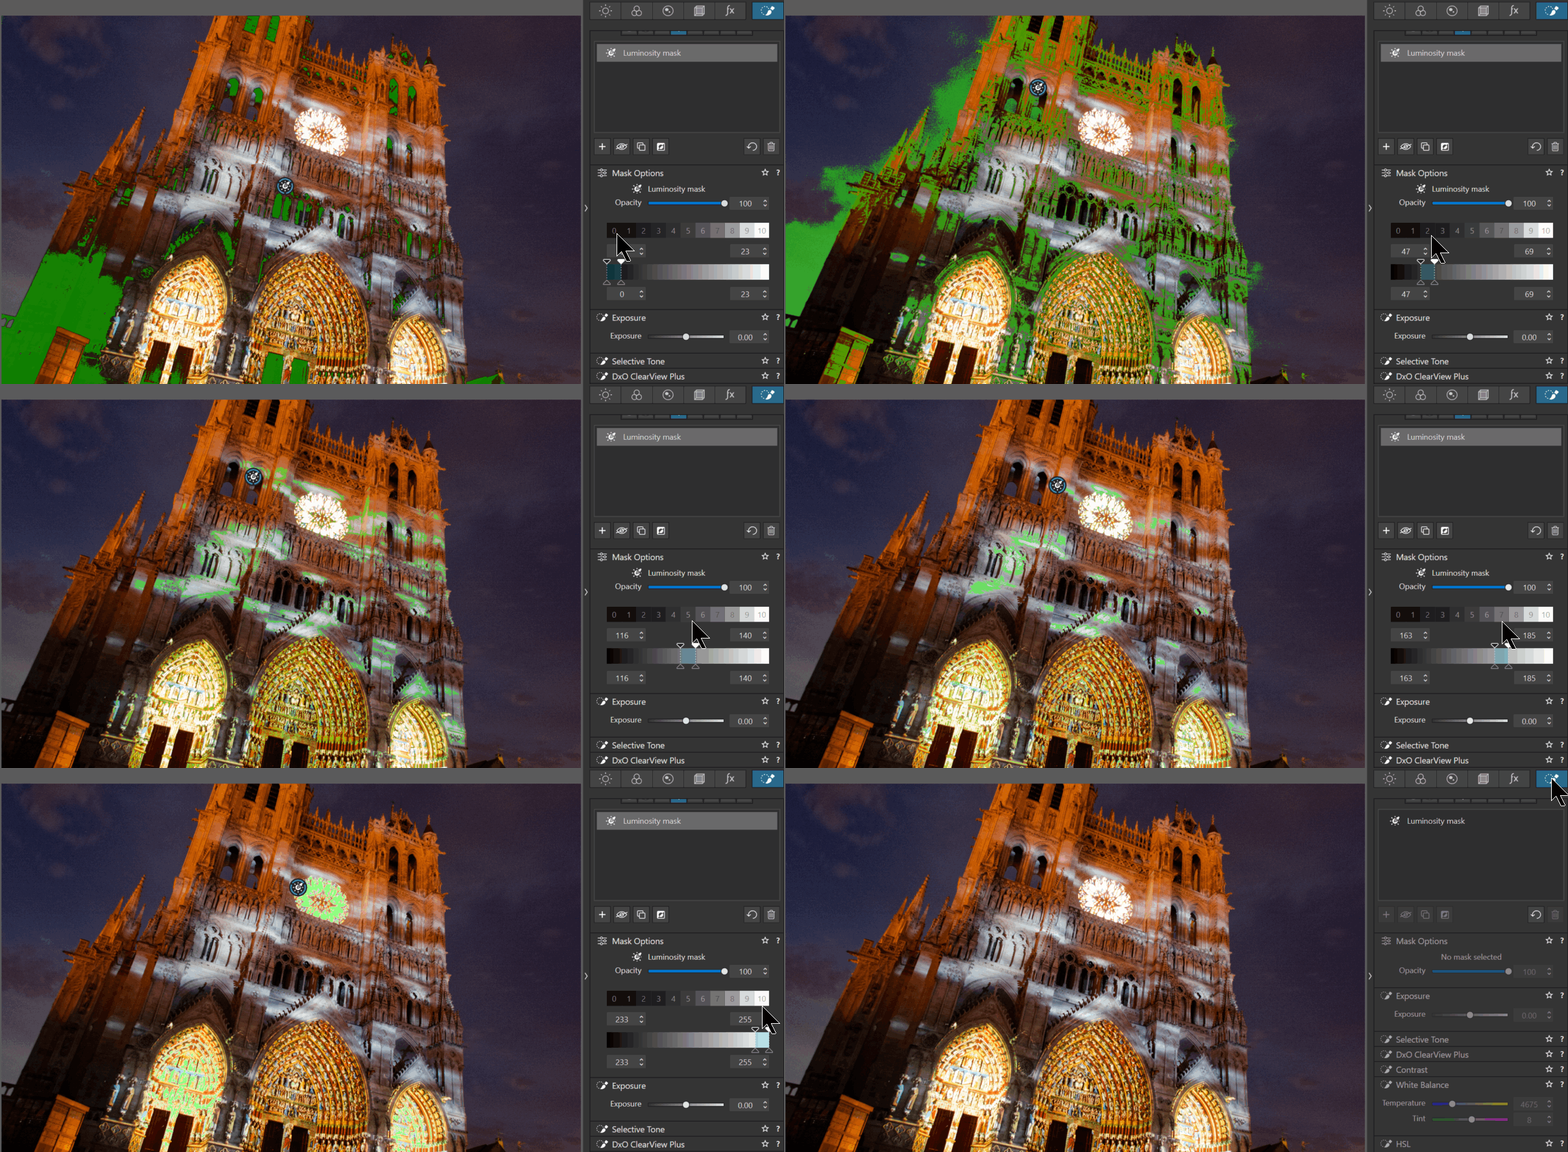
You can recognise the of Ansel Adams’ zone system ranges.
You can use the Luminosity mask to check the distribution of bright areas.
– Place the pipette anywhere in the image
– Select zone 0 and tighten the lower scale to 23
The mask shows all zones of luminance 0
– Move, without clicking, the trapezoid (now a square) next to zones 0 to 10
Note that these are the histogram luminance values
The area covered by the mask in each of the 11 ranges provides information about the tonal balance of the image.
Be aware that zones 0, 1, 9 and 10 have little or no detail.

TuToDxO.com – All rights reserved – tous droits réservés


