The Local Adjustment of the Control Point is of a particular nature. It takes into account the luminosity as well as the color – hue and saturation – of the group of pixels covered by its central crosshair to apply the correction to the pixels with the same characteristics within the selection disc.
Unlike other Local Adjustments that apply corrections throughout their area of influence, the control point isolates silhouettes within its circle of influence.
Two selectivity settings define the sensitivity of the collector based on color (Chroma) or brightness (Luma) for total control of the effect.
Generally this Local Adjustment is done in two steps:
– Right click on the image to open the radial menu – Select the Control Point (Shift+ C)
1- Left click on the image to place the crosshairs on the reference area
2- Define the diameter of influence of the Control Point by modifying the circle
– Create several complementary discs of the retouching
The counterpoint – or Protection Point – allows you to restrict the effect of retouching inside its influence disc.
– Press the ALT key when put the protection control point
Press theM /Shift+ Mkey produces a grayscale rendering to appreciate the smart mask’s coverage.
When inverting the mask (Shift+ I), no mask can be added.
– Reverse the mask again to add a control or protection point
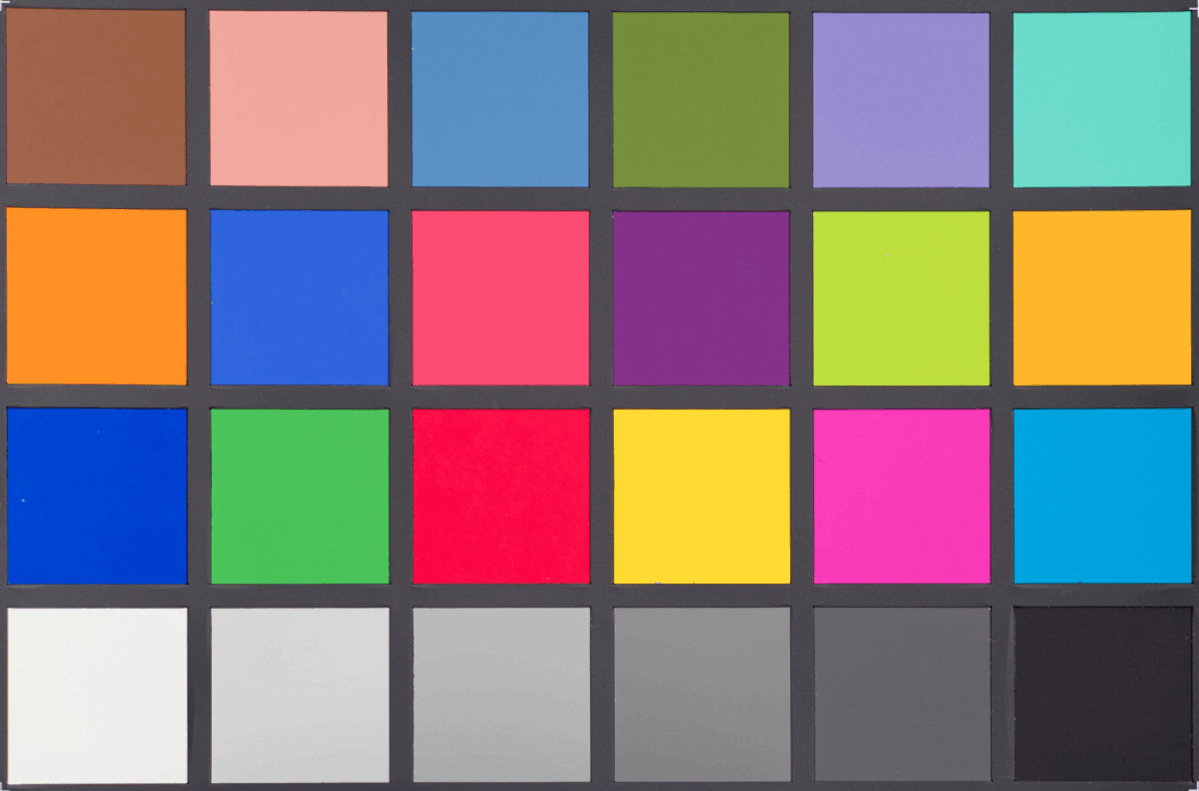
The illustration shows the tool behavior:
– Set the initial Control Point (a)
– Diffusion on the salmon square (b)
– Display of the mask (M /Shift+ M) for the perception of its coverage (c)
– Exclusion with a protection point (ALT key) (d)
– Modification of the diameter of the application disk (e)
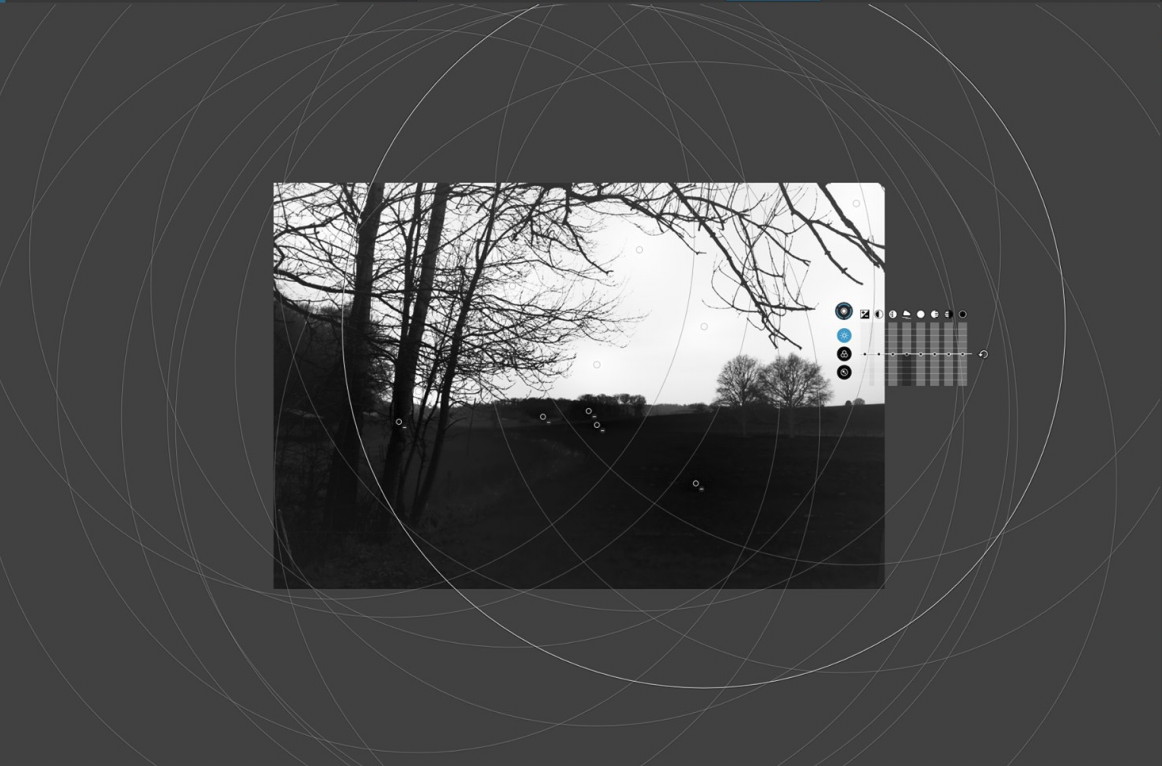
The illustration allows to understand the crosshair placement:
– Put the center of the crosshair accurately in the image
– Flip in mask mode (M /Shift+ M) and move the crosshairs which become a gray circle. This circle is used for feathering purposes
– By moving it from one color zone to another, the application of the Control Point effect varies

The diffusion area in the effect disc of the control point decreases with the power of the correction. This makes it difficult to control the application of the correction.
The illustration shows three discs of the same diameter with different scattering areas.
Application
The collection of the reference zone is specific to each Control Point but the correction, via the equalizer, is common to all the discs placed in the same Local Control.
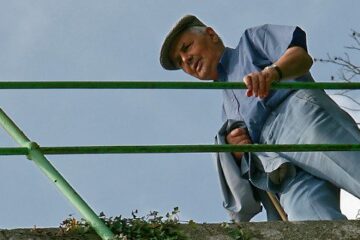
The illustration (PhotoLab version 1) is a concrete approach of tool usage:
– Lightening of an image point
– Scattering retouching to other points
– Preserving the sleeve of the brown sweater with a protection point (touche ALT)
Advanced usage
An alternative use of selectivity turns the Control Point tool into a standard Radial filter.
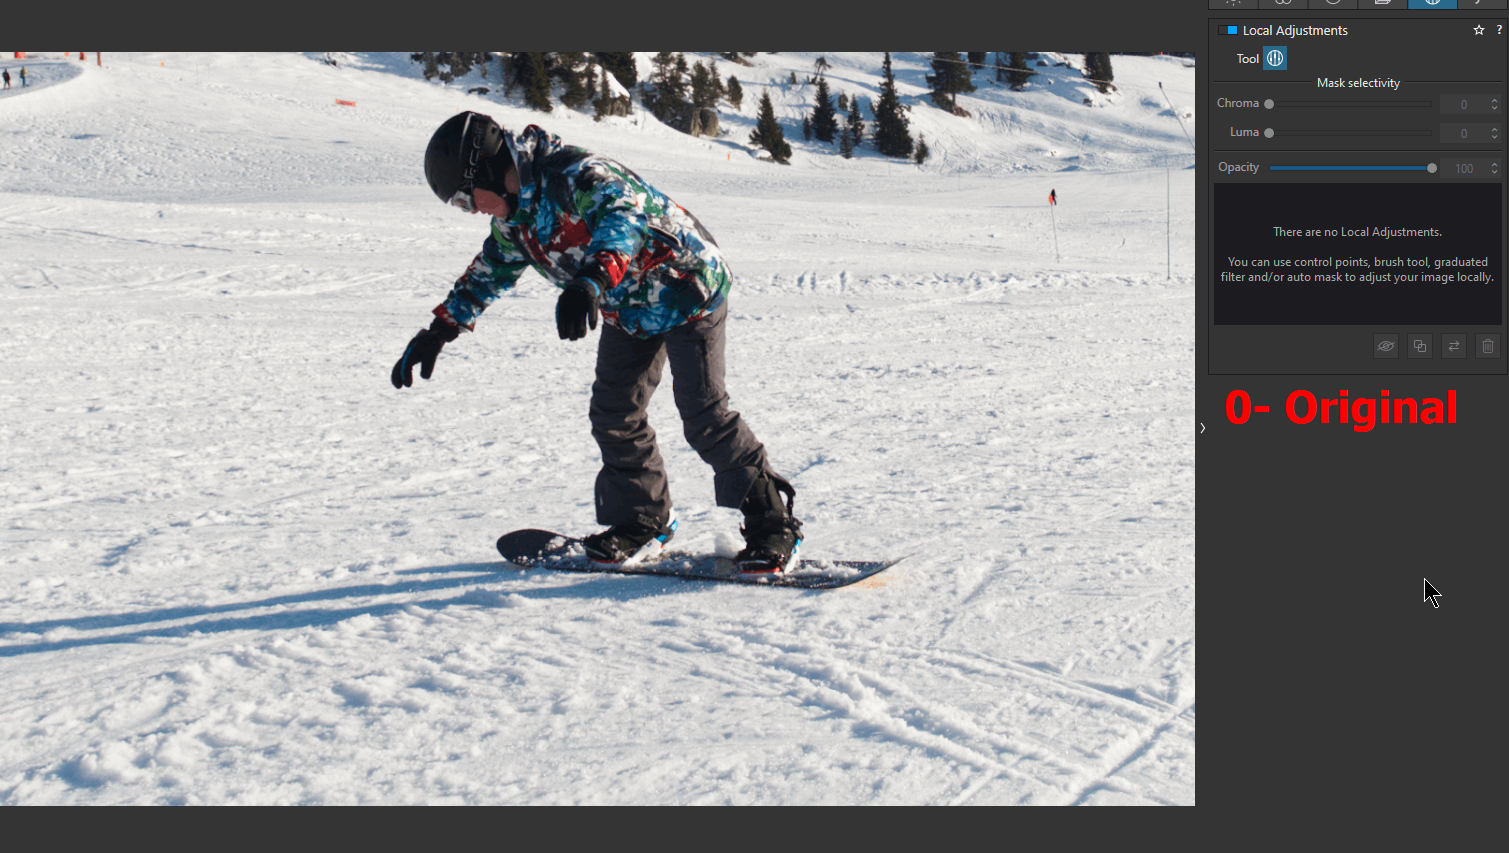
The character needs to be lightened, the patchwork costume makes it difficult to apply the standard Control Point mask.
0- Place two control points (here voluntarily on dark areas) – Not much happens
1- Set both mask selectivity parameters to 0% allows the local lightening setting to be applied as a Radial filter
Cautionary statement
Applying dozens of Control Points goes against the philosophy of PhotoLab which is to assist the photographer. In PhotoLab, the key to success is to limit the number of operations.
The Control Point is magical but not always the best tool.
In addition to the time spent and the loss of control of the process, this operating mode creates artifacts (spots in the sky, borders, etc).
Finally, the export time will be considerably increased.
TuToDxO.com – All rights reserved – tous droits réservés.